Valentine’s Day Treats

Some eye candy for you and some real candy for my girls! Check it out …

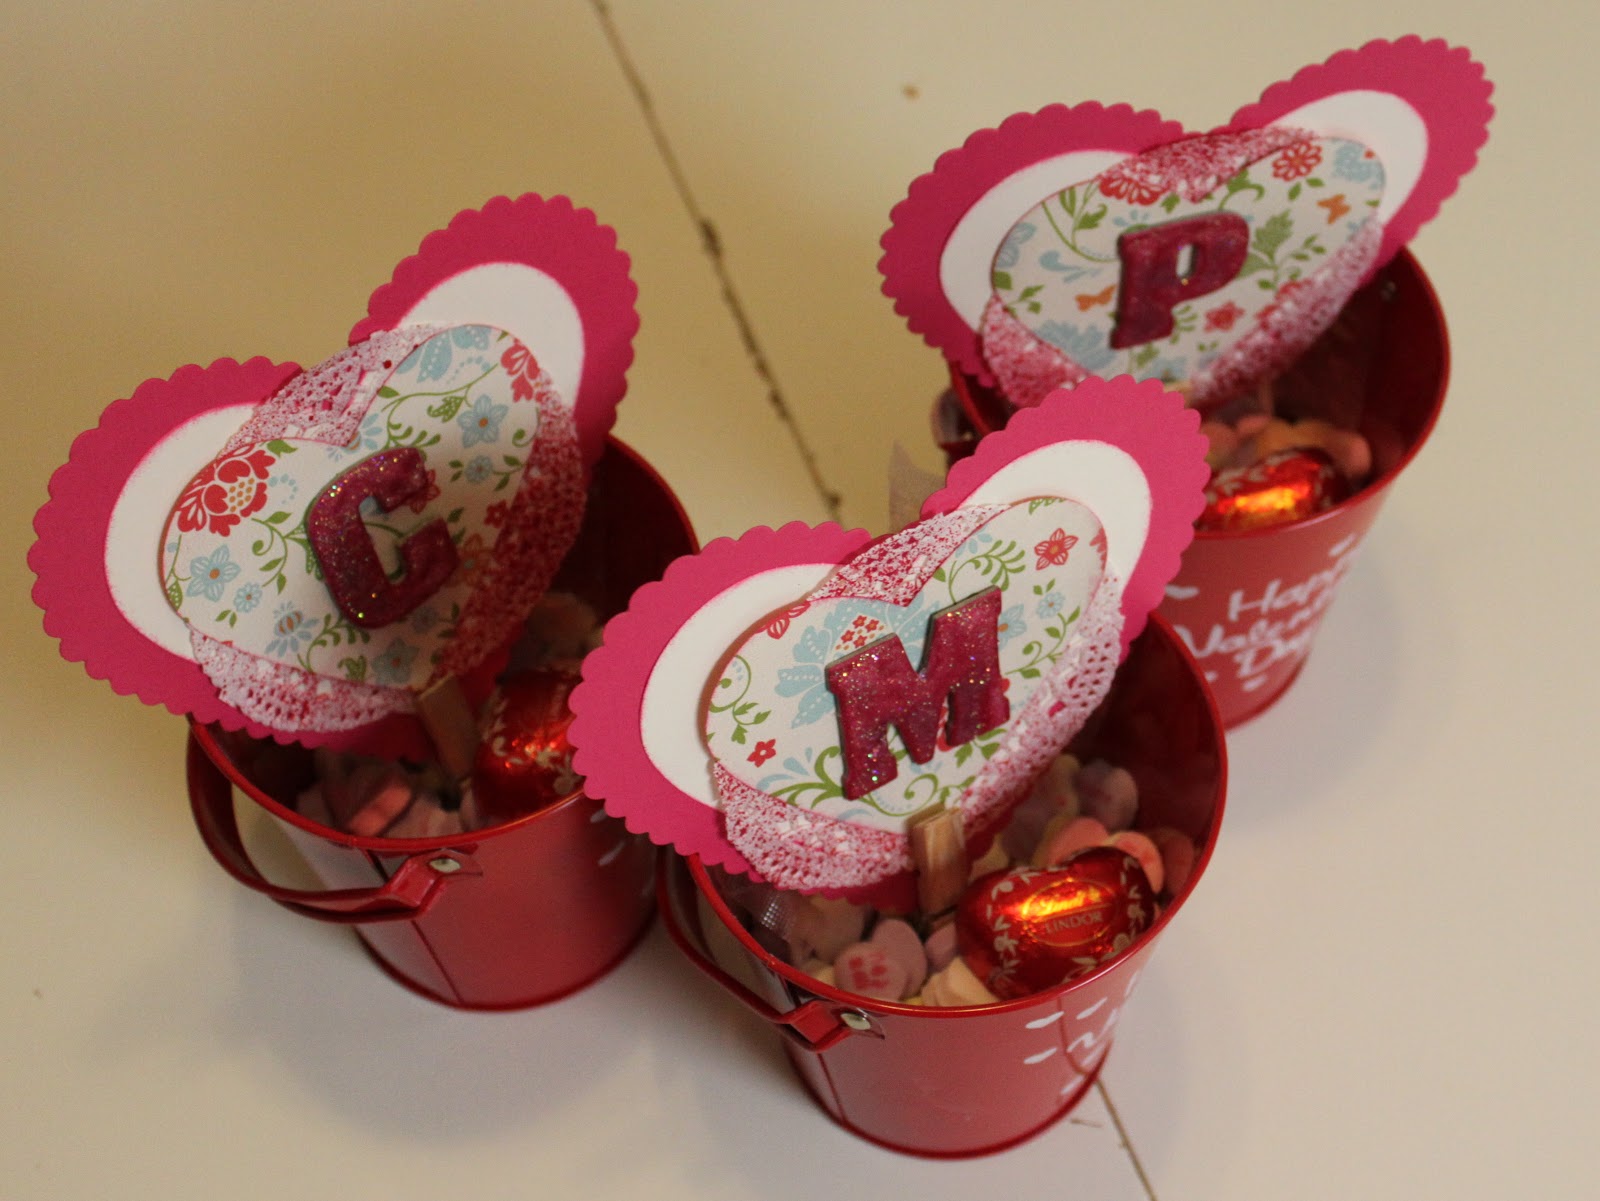
So the little buckets were purchased at Dollarama and then I filled them with candy hearts.

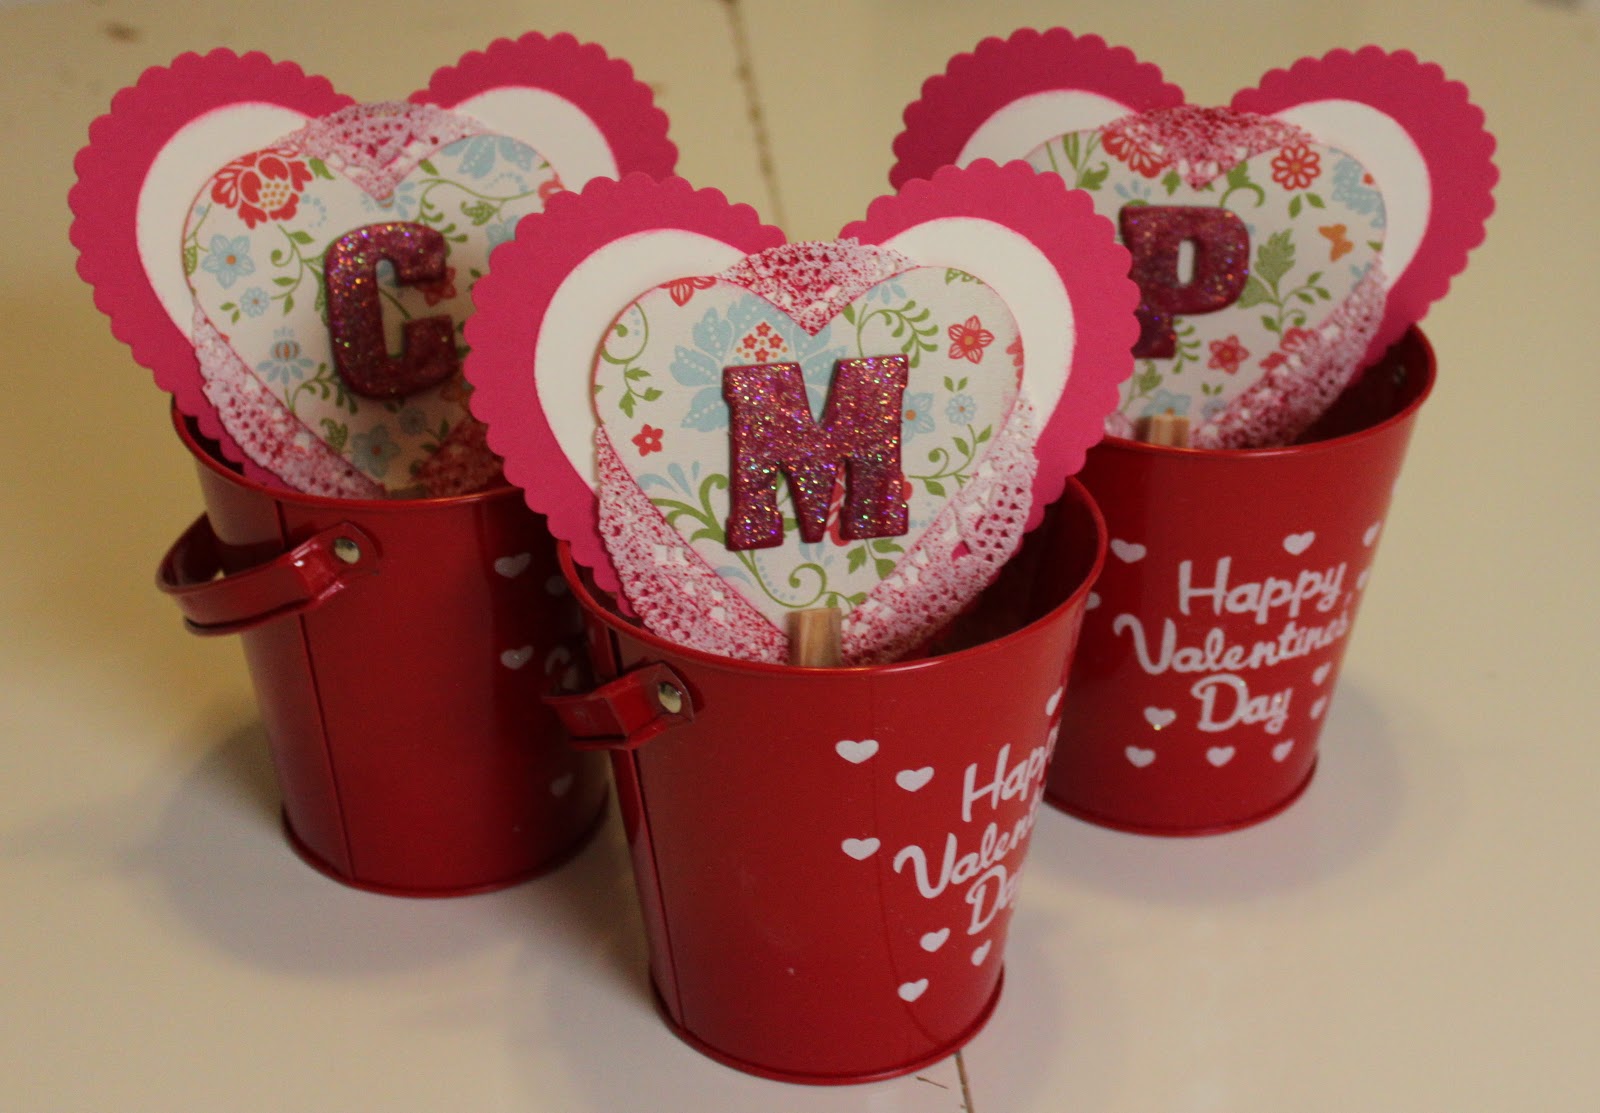
To get the hearts to stand up in the tins I attached a clothes pin to the bottom and hid it among the candies.

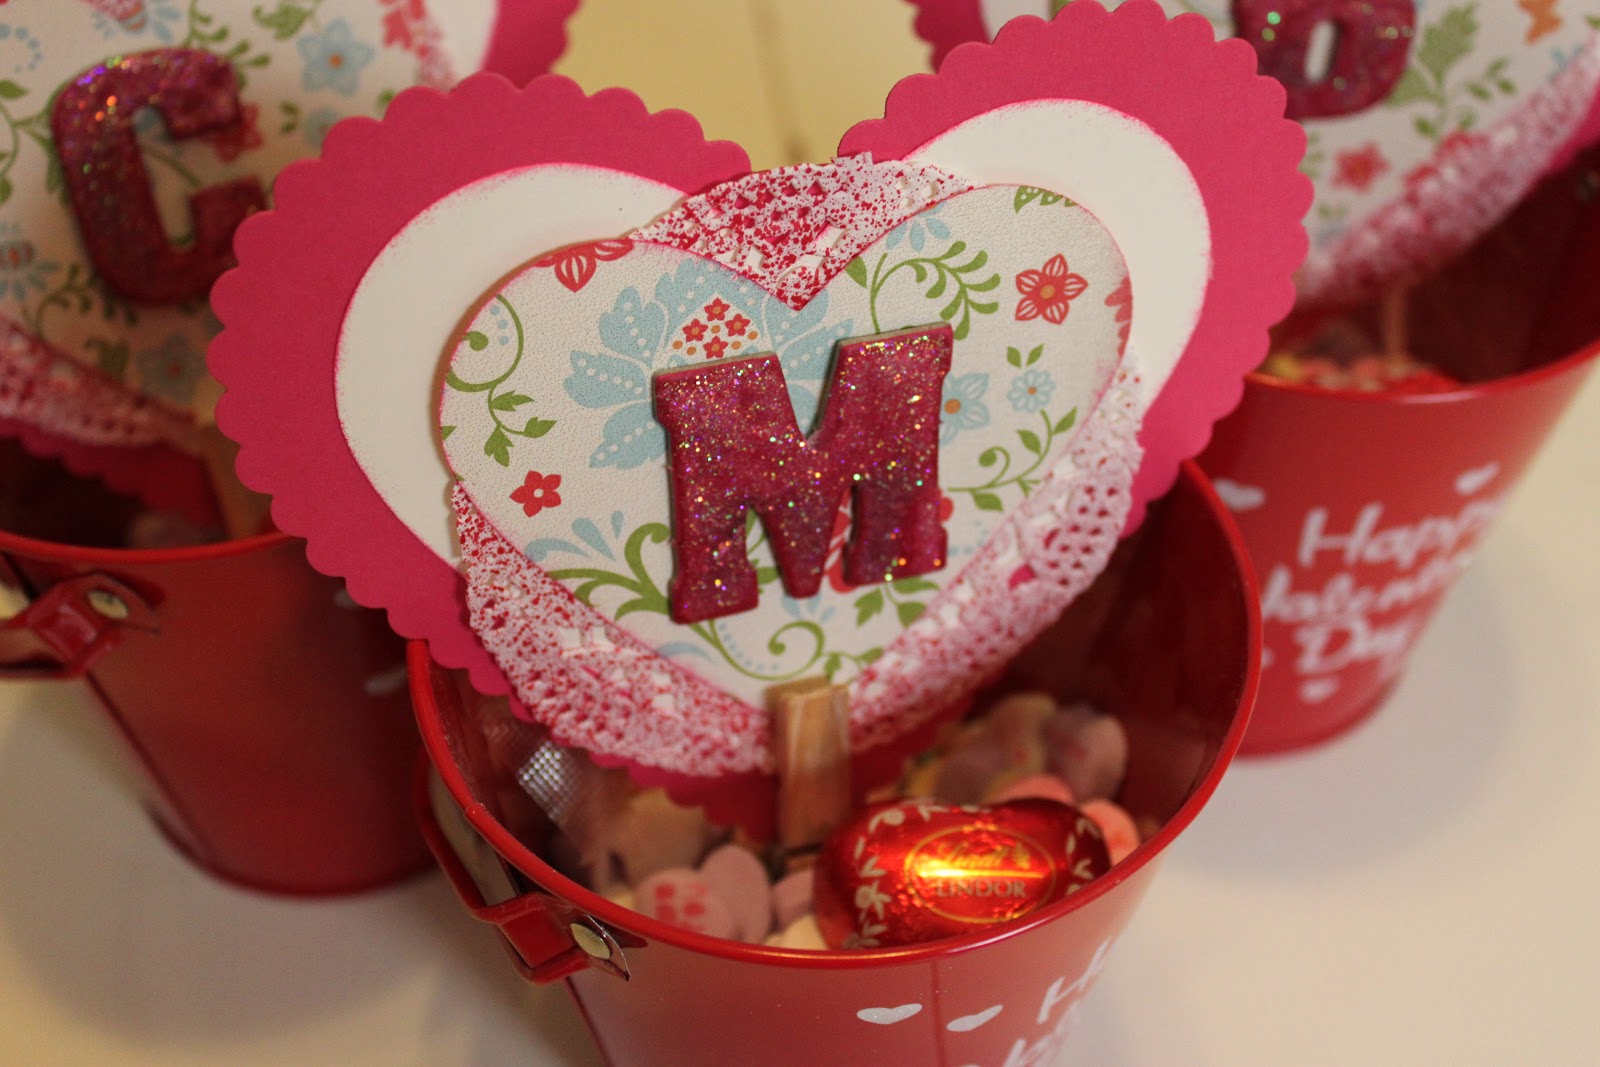
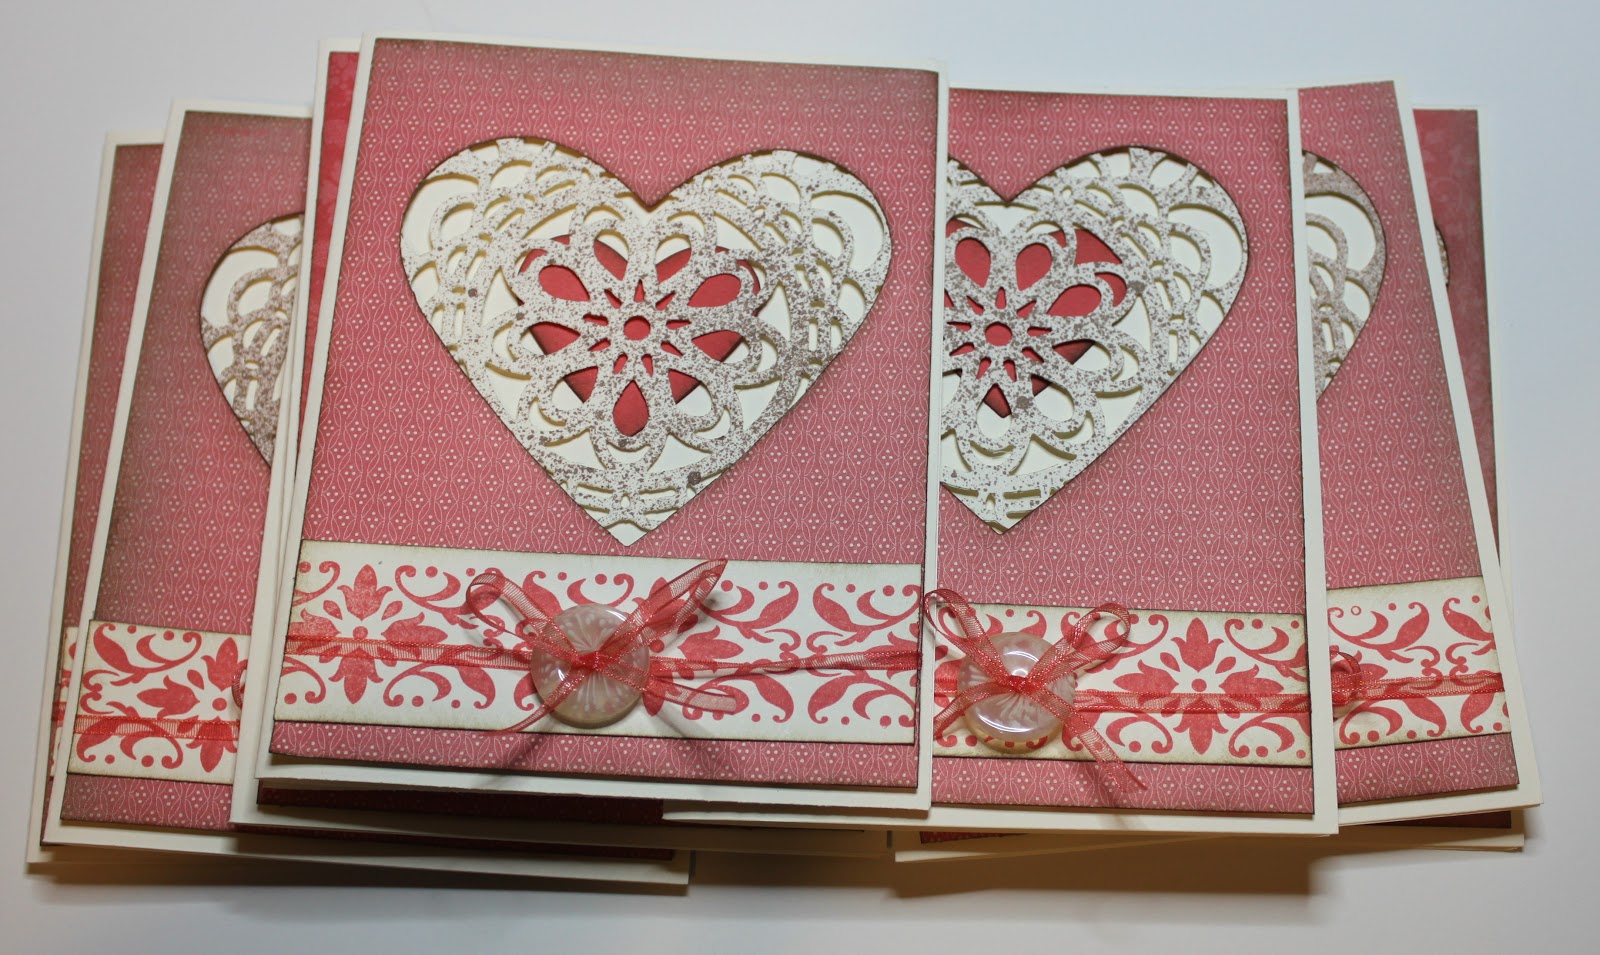
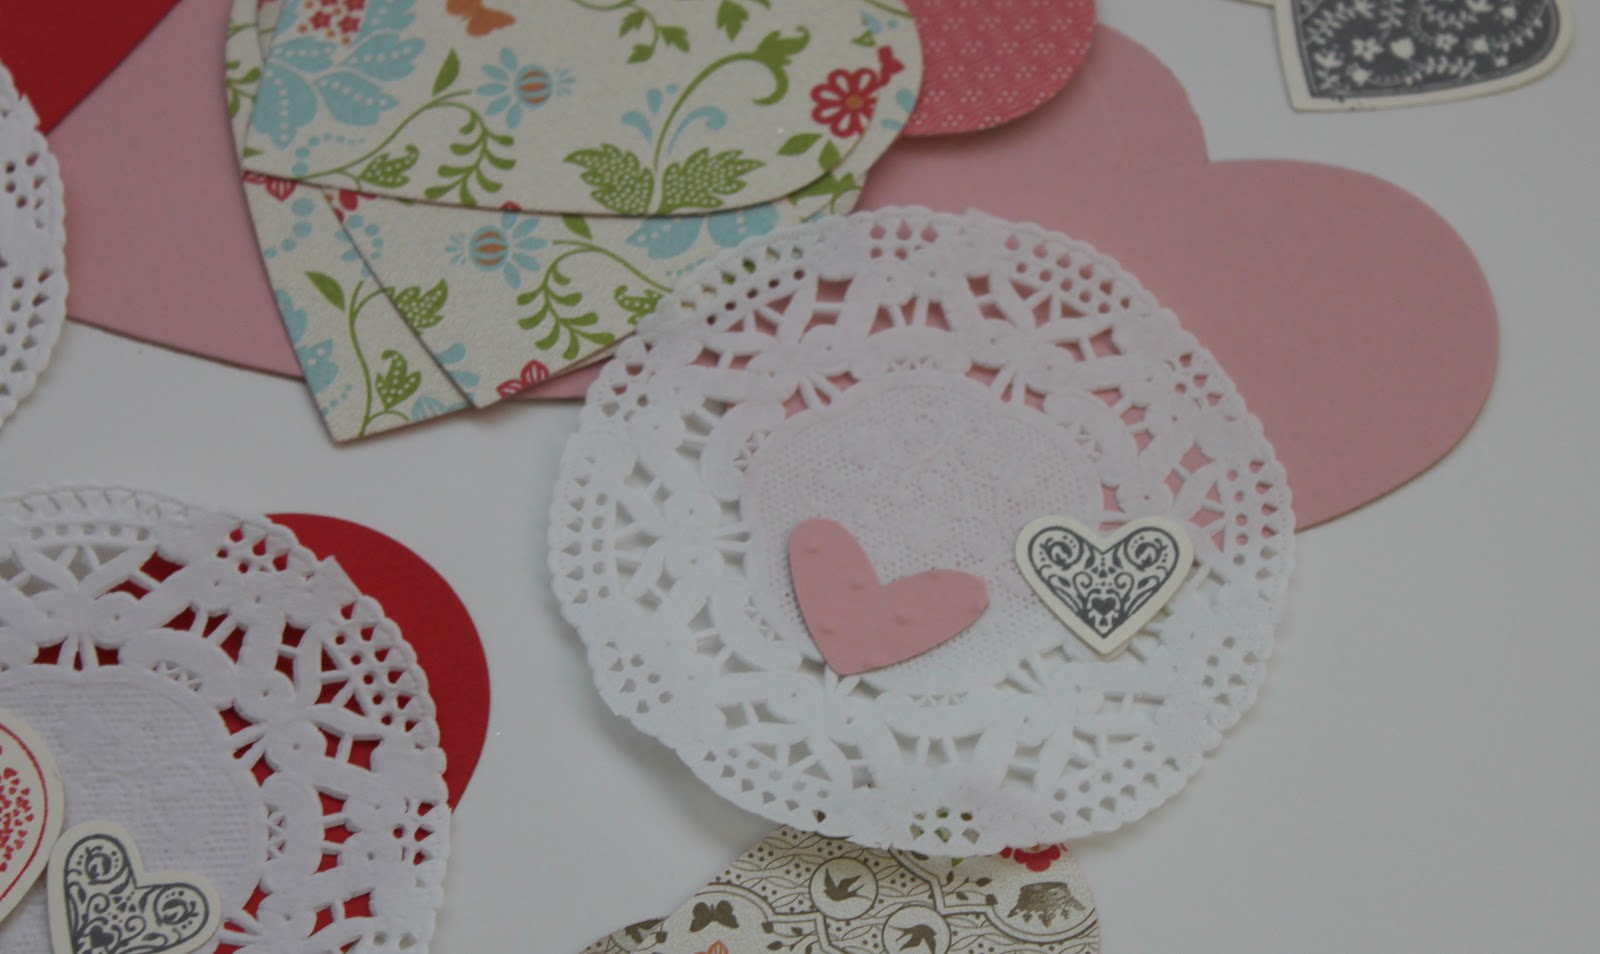
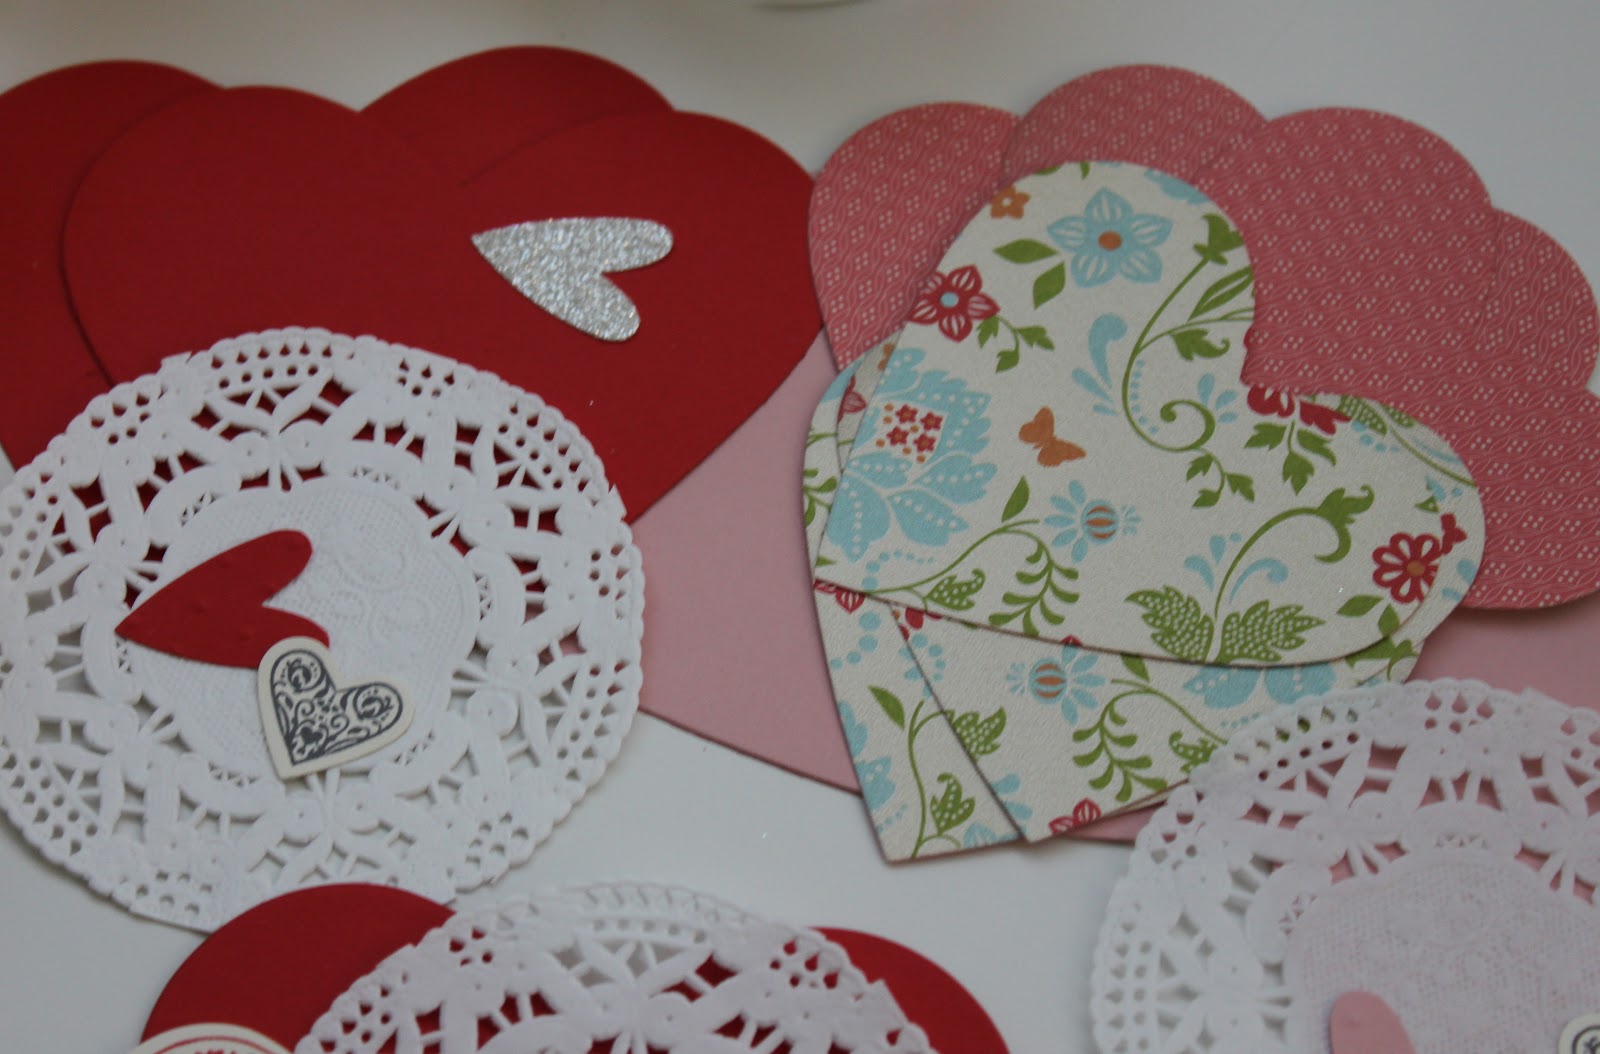
Here’s how I made the Valentines: using the Hearts Framelits Dies, I cut out a piece of Melon Mambo card stock with the largest size heart and started layering. First is a piece of Very Vanilla Card stock (which I inked around the edges with Melon Mambo ink) then a Dollar Store doily spritzed with Smooch Spritz in Blushing Bride. On top of that I put a piece of Everyday Enchantment DSP (once again, inked around the edge) and finally a monogram.
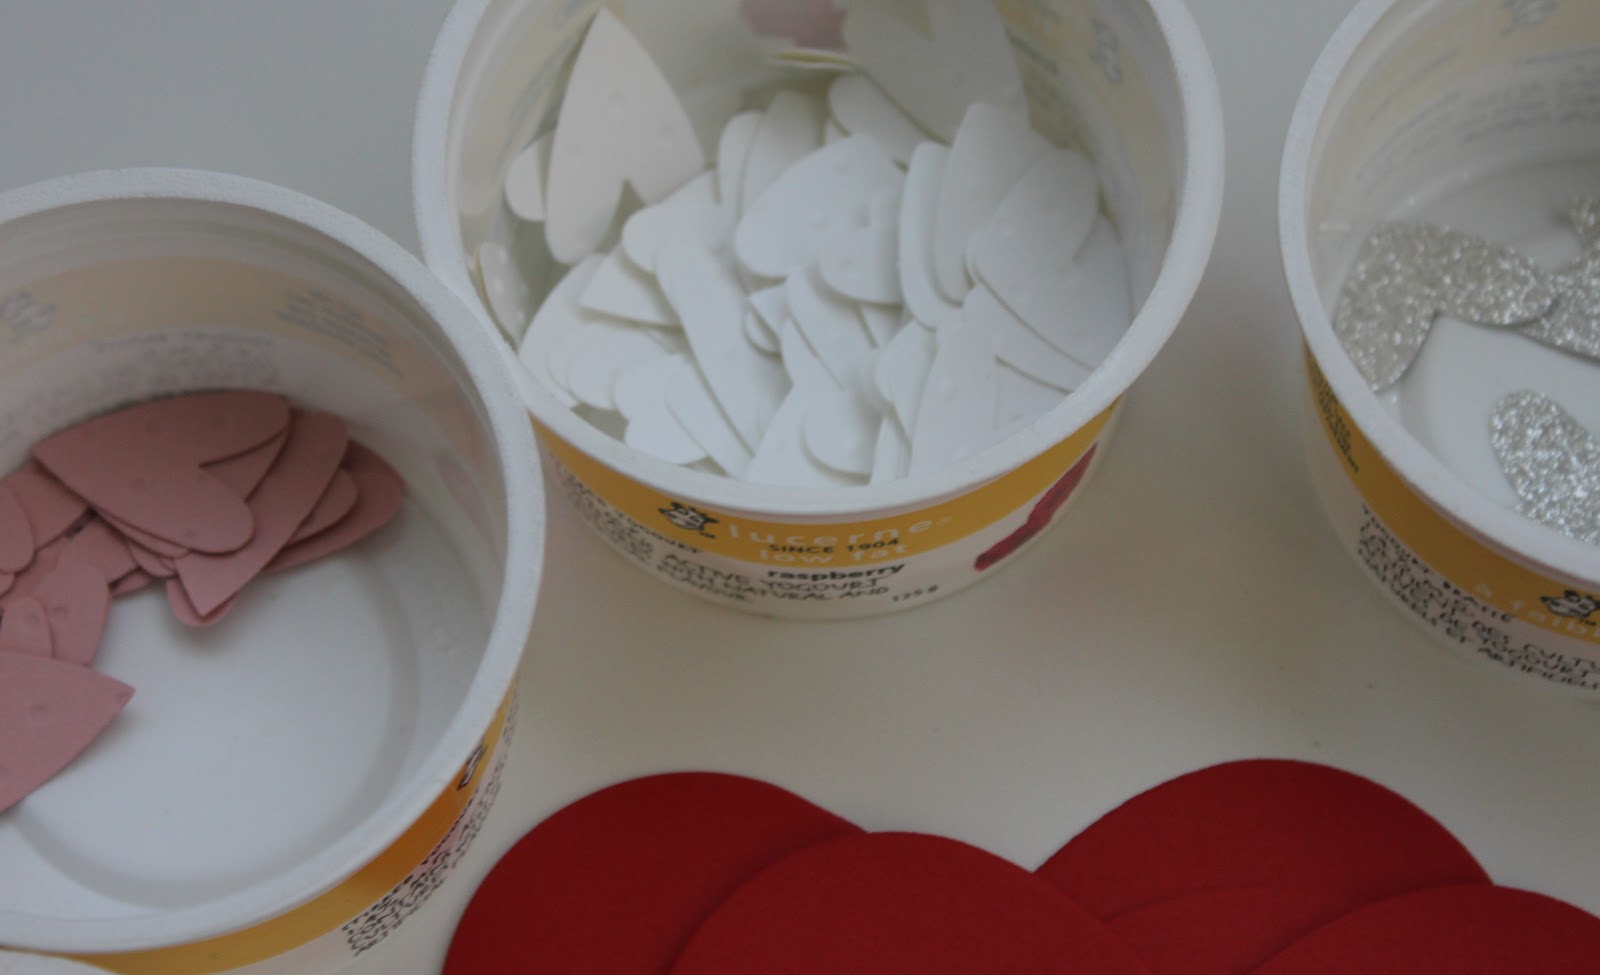
The monogram was made with the Alphabet Soup On Board letters that I inked in Melon Mambo then covered in Dazzling Details. (Note to self – 3 hours is not quite enough drying time!)

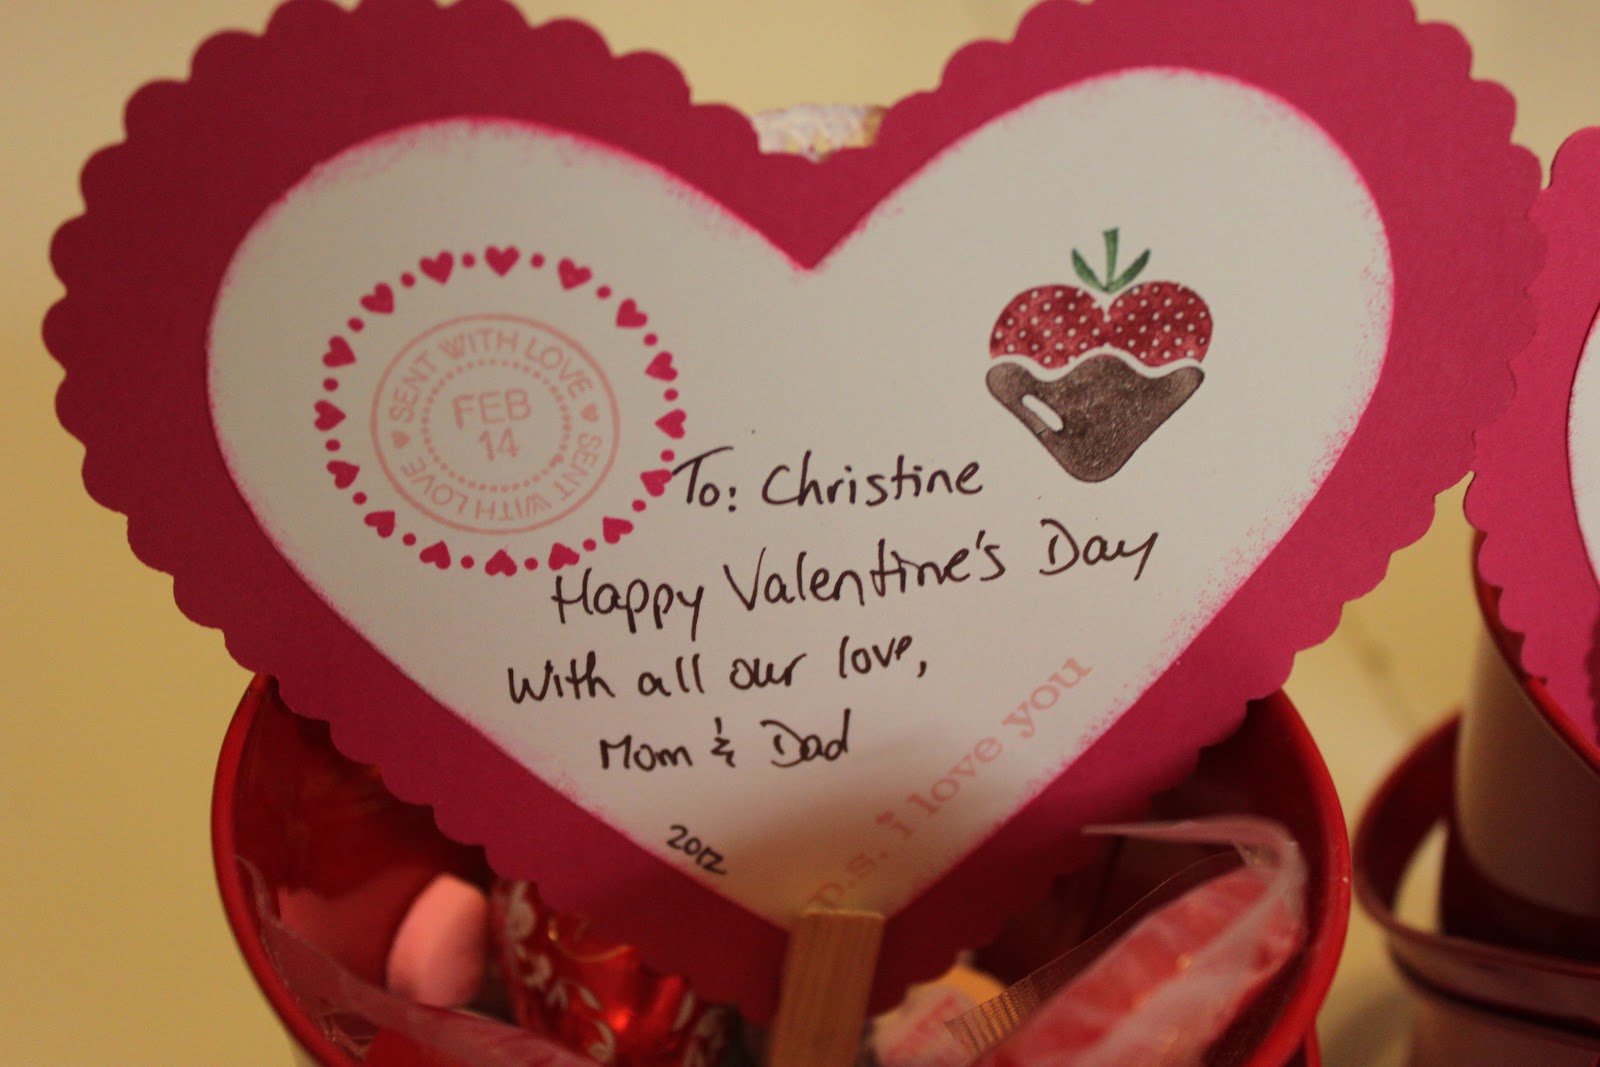
For the back I stamped some images and sentiments from P.S. I Love You onto another Very Vanilla heart inked around the edges with Melon Mambo ink. To get the different colours on the strawberry I used my Stampin’ Write Markers in Riding Hood Red, Chocolate Chip and Garden Green. It’s very easy to use these markers on Stampin’ Up stamps to create custom coloured stamped images. Just colour the stamp, huff on it to re-moisten the ink and stamp as normal. Voila! Custom coloured images!
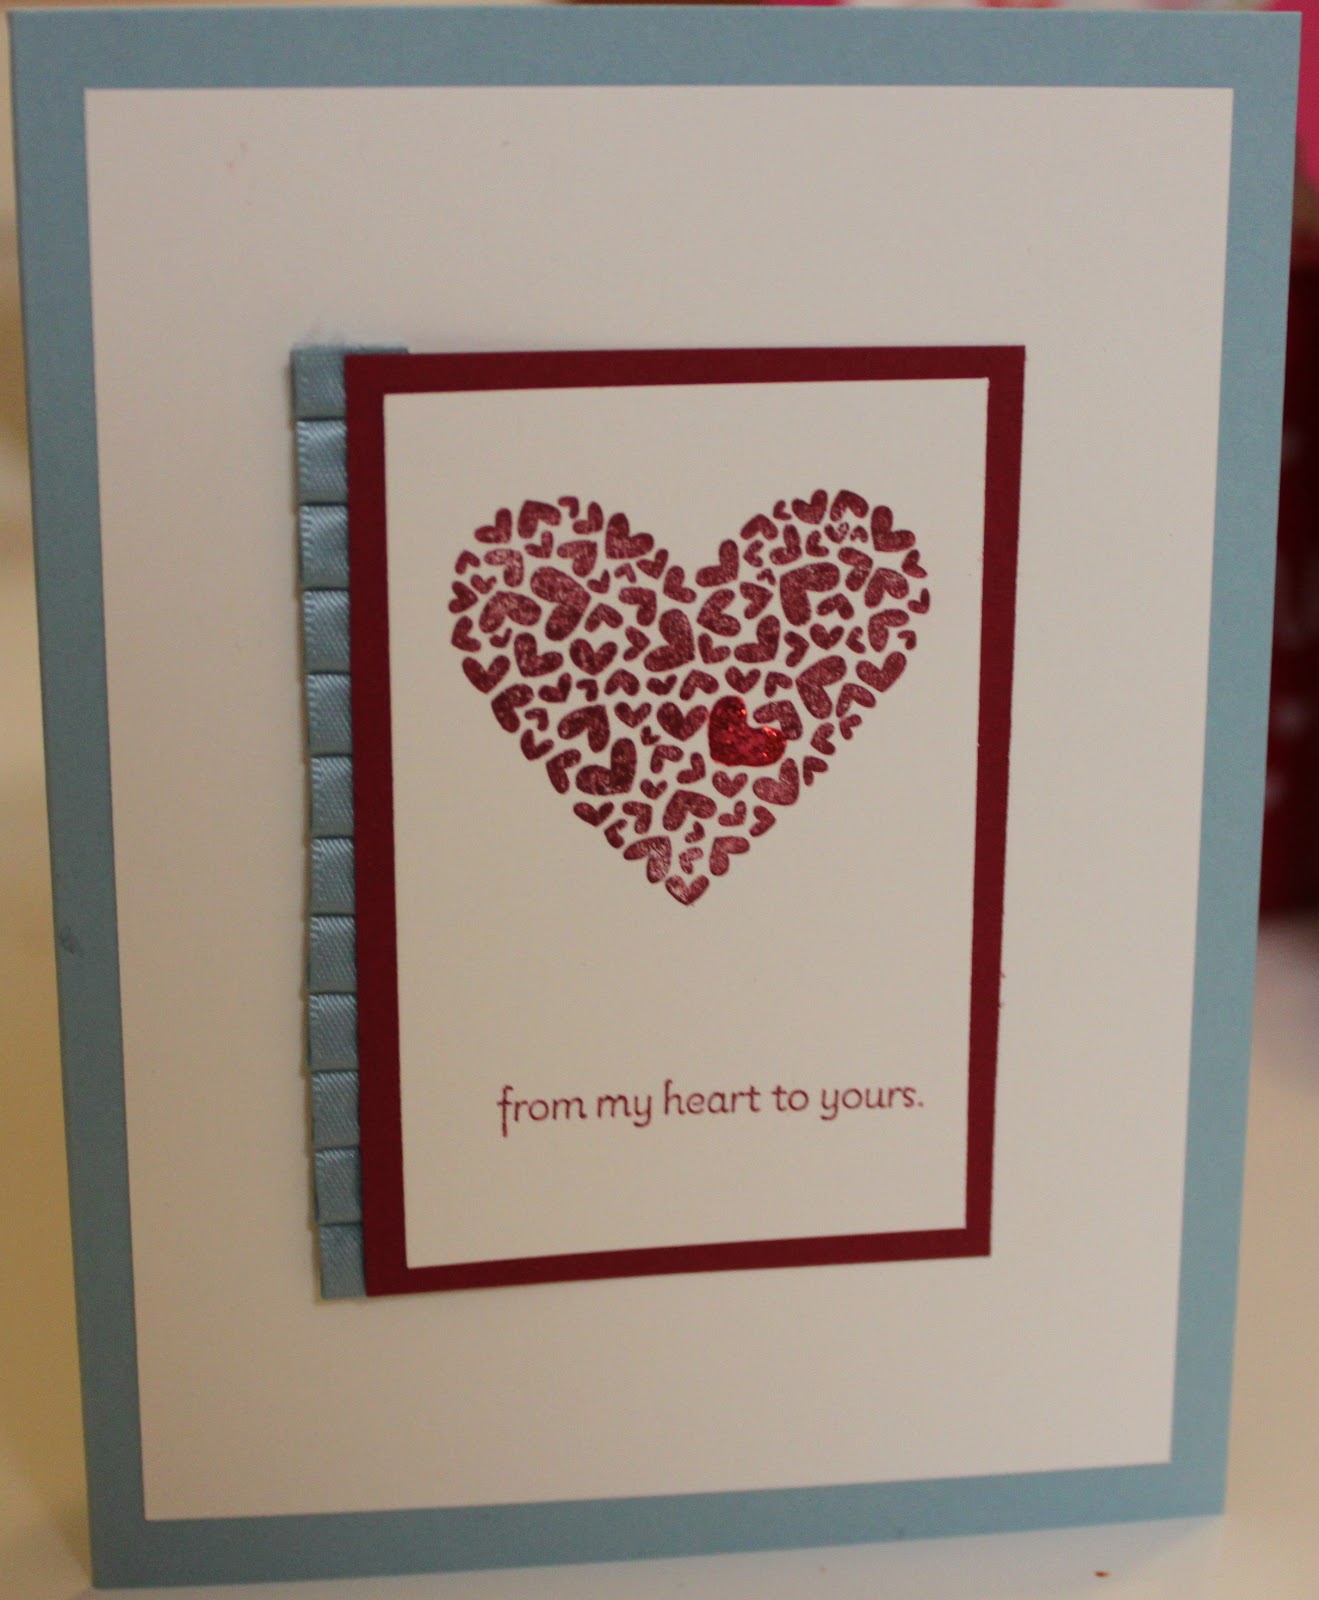
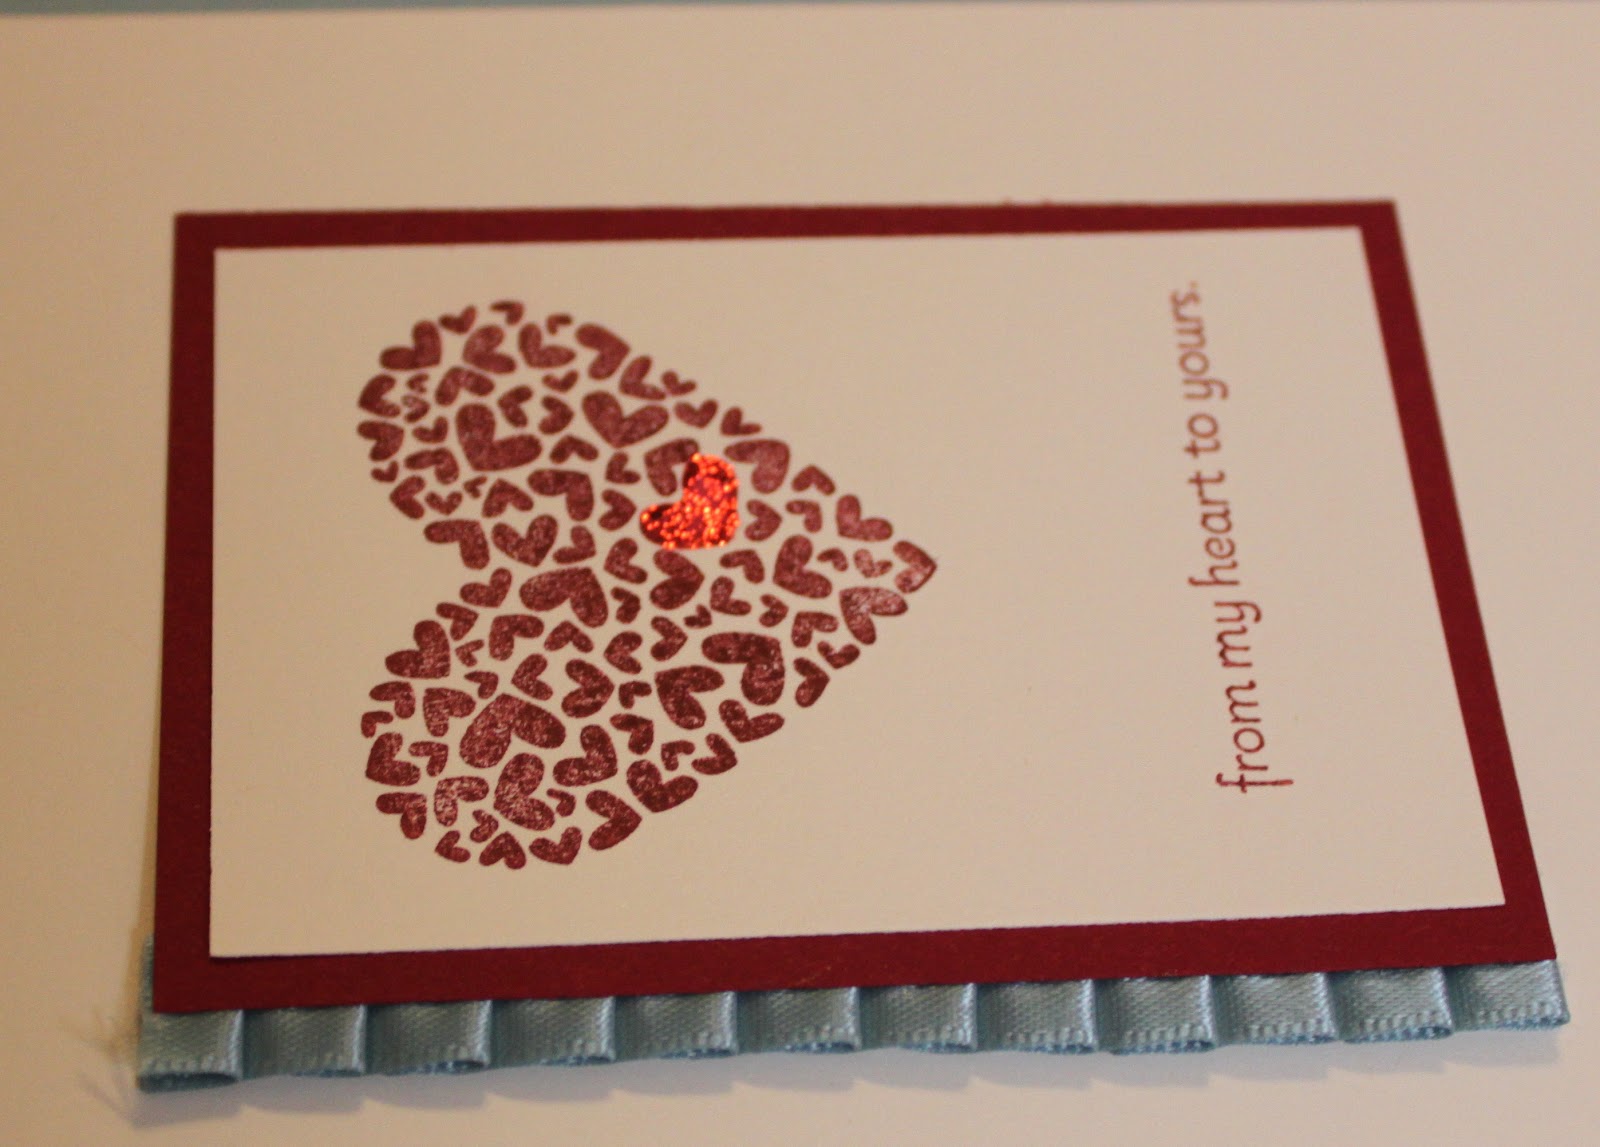
And the husband wasn’t left out of the hand made card parade. He received this lovely card that I made at an Upline meeting a couple weeks ago. Thanks to Kristina for the cute make-and-takes!!

This card also uses the P.S. I Love You stamp set and what I really love (and a great reason to go to my meetings so I can learn tricks like this to teach my customers!) is the one heart we covered in Cherry Cobbler Dazzling Details. A simple thing but what an impact!

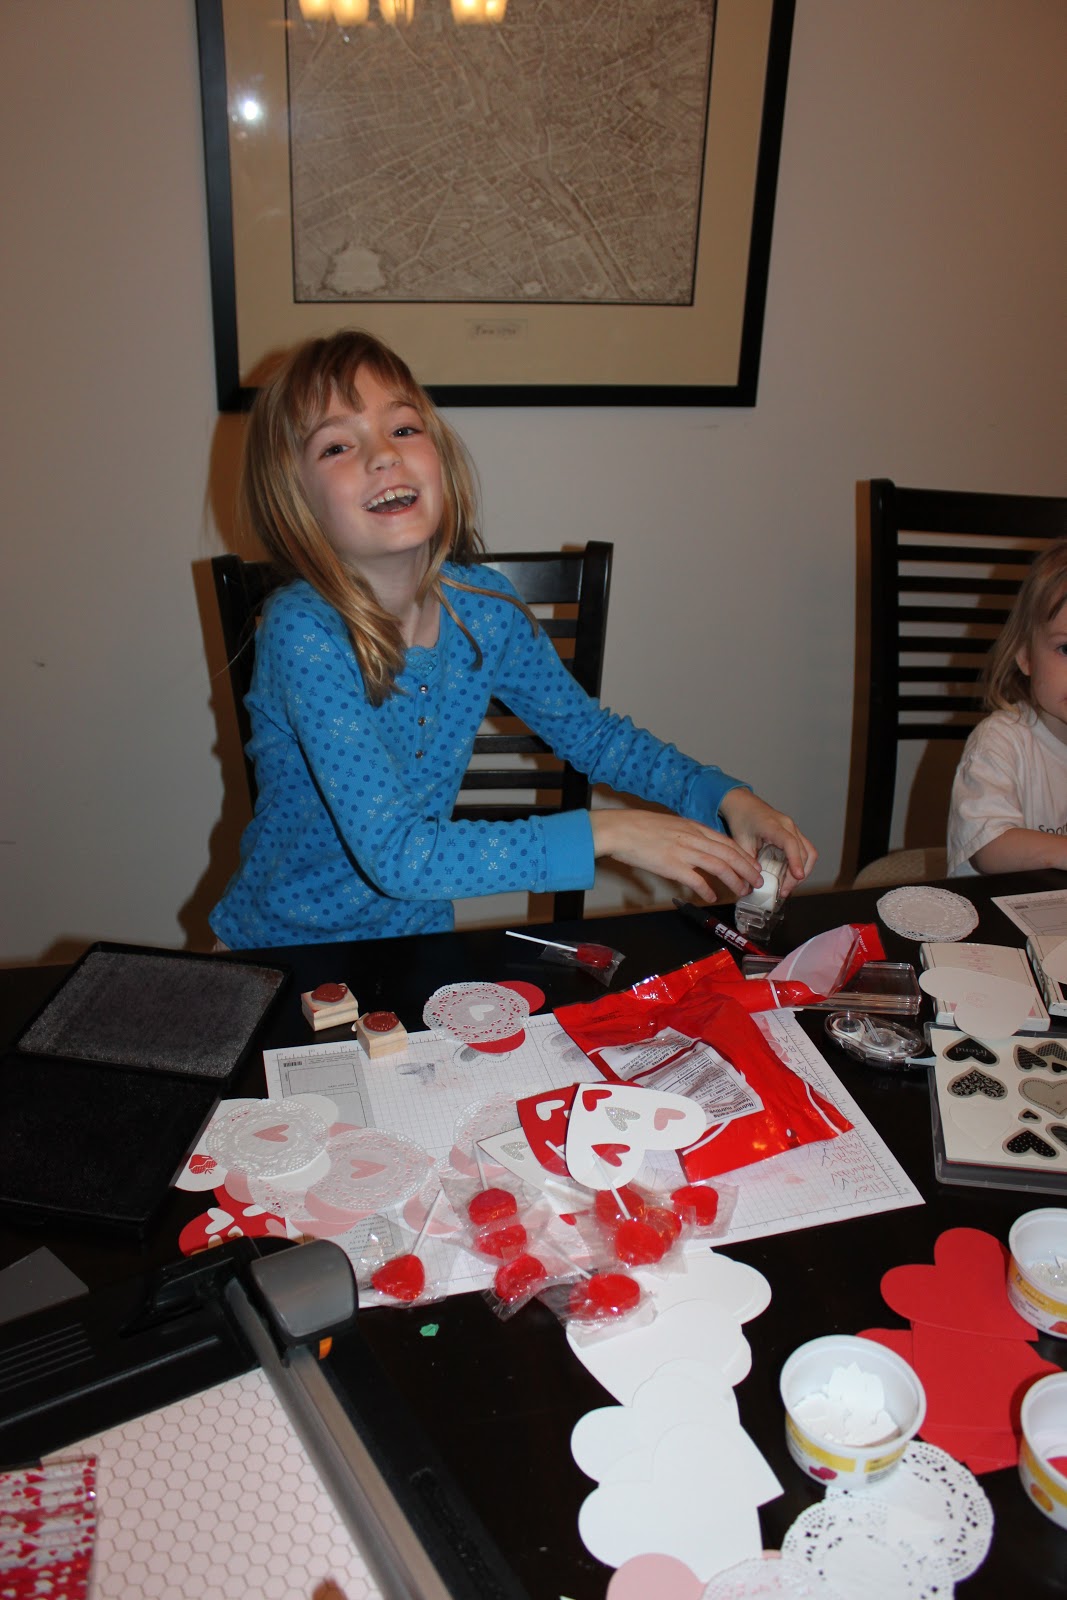
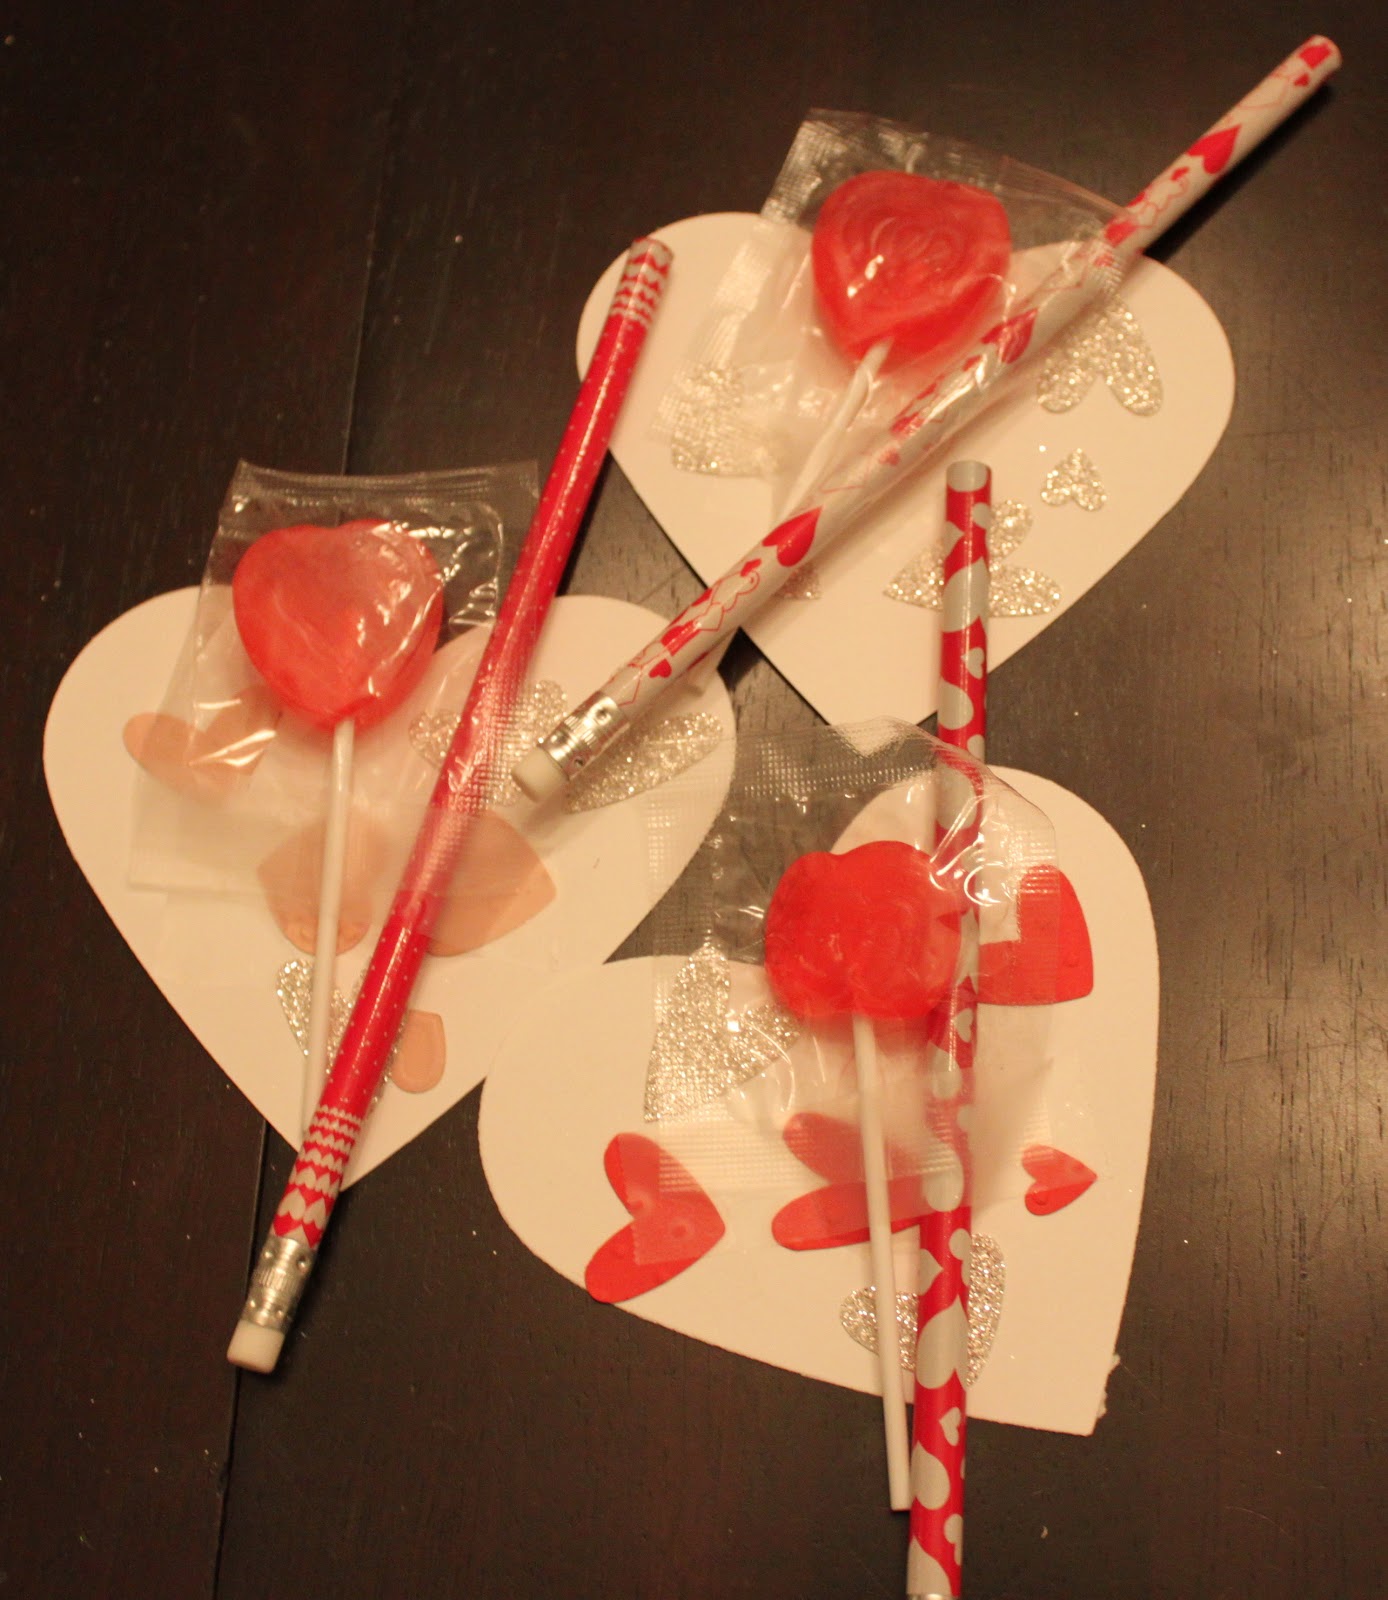
A few last pictures showing the fun my girls had making Valentine’s for their class mates. I offered this as a class but had no takers so my girls got to go nuts!

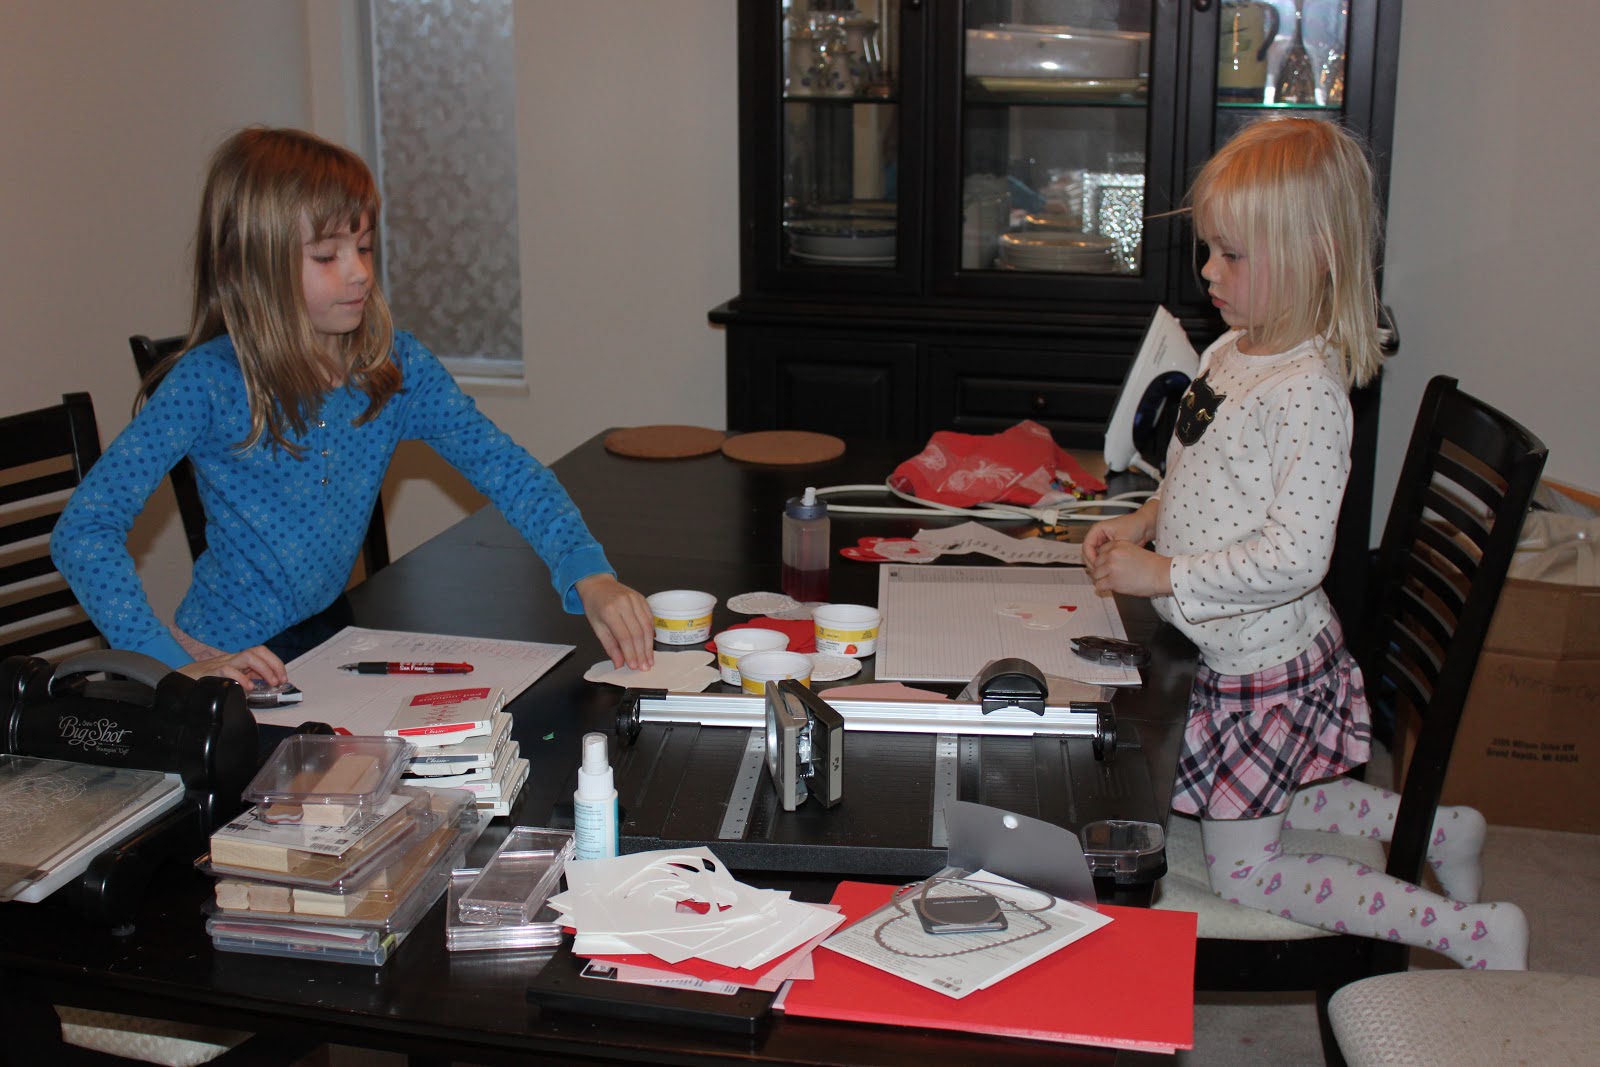
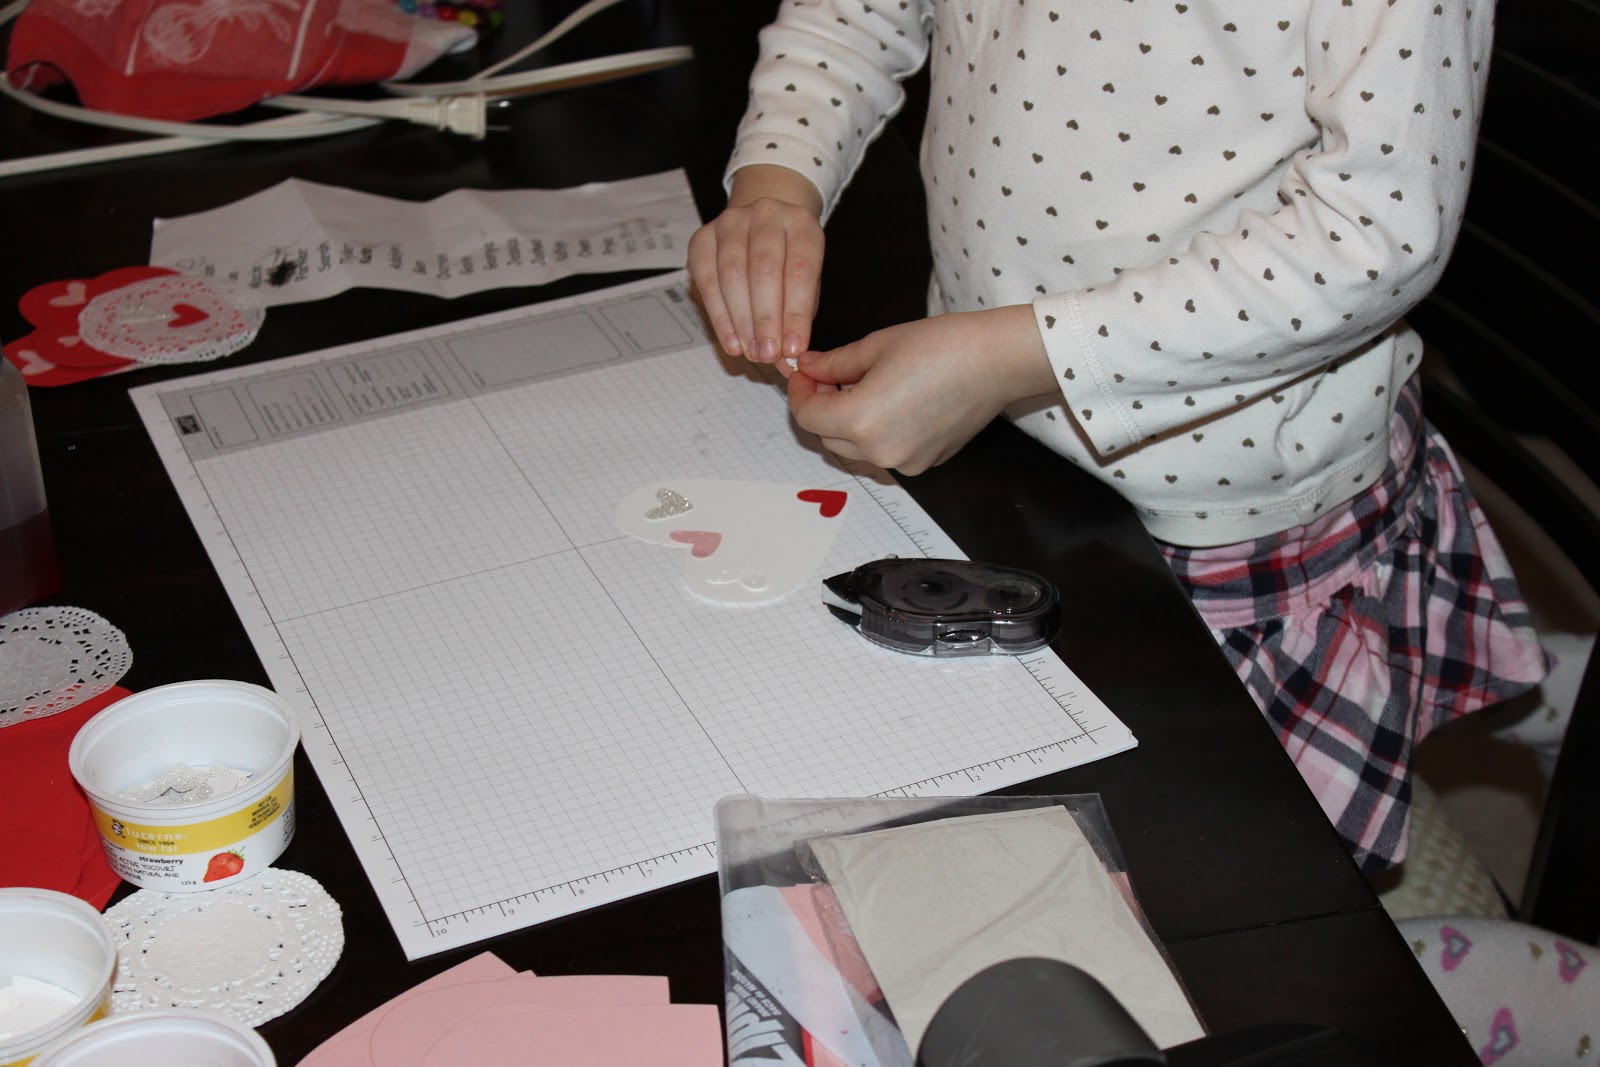
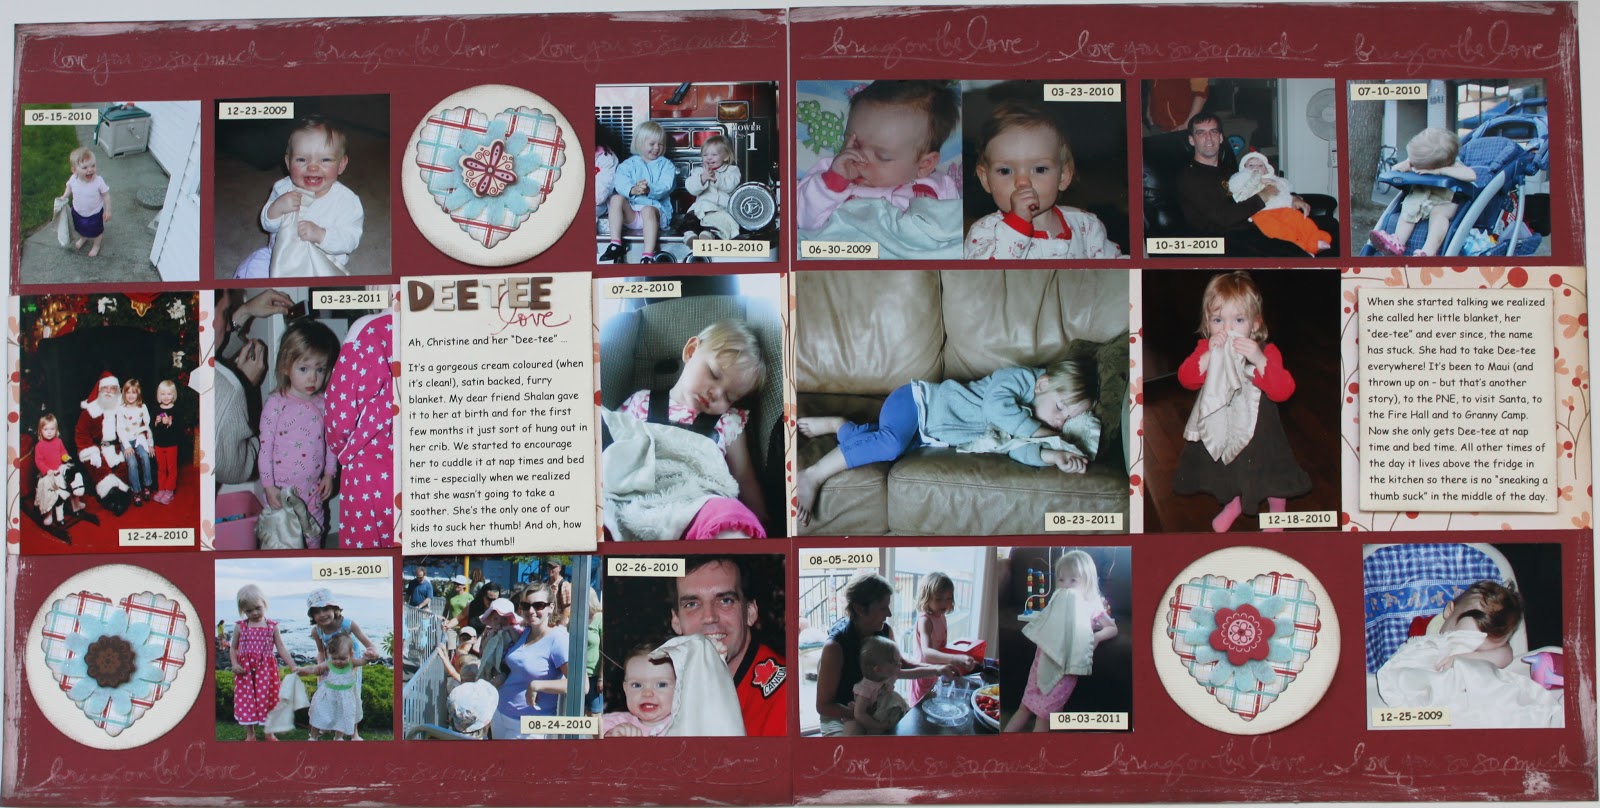
Even little Christine got in on the action!

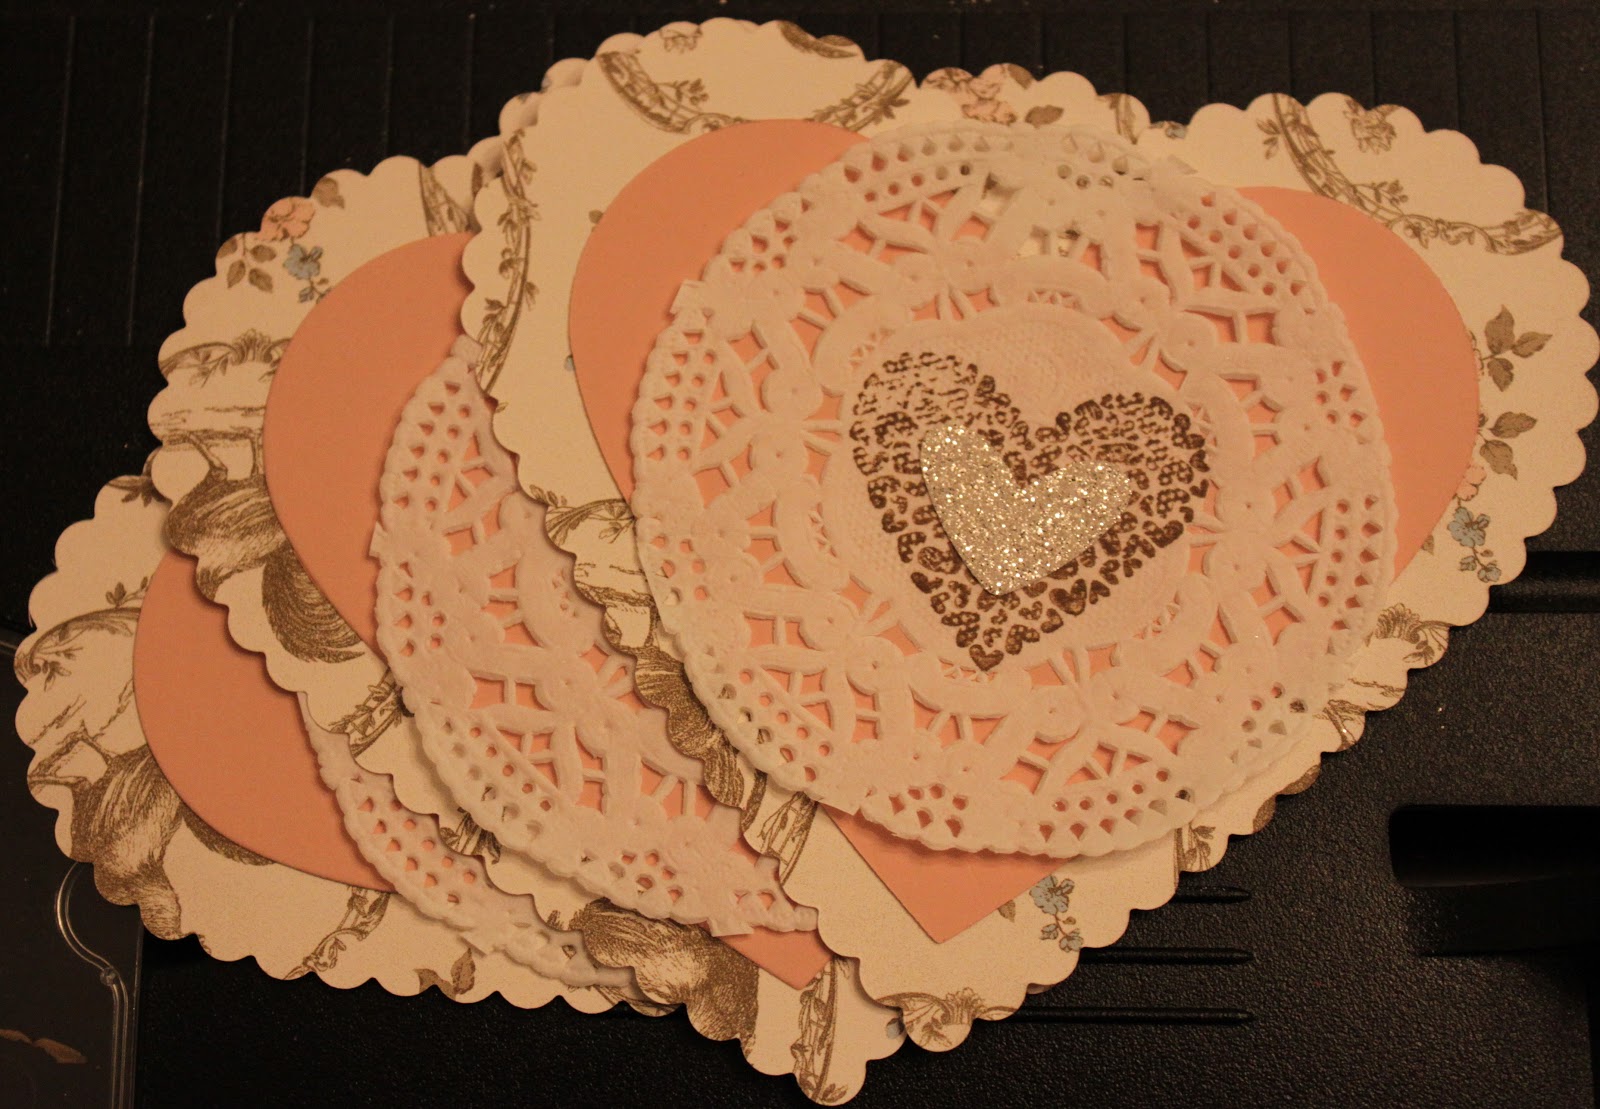
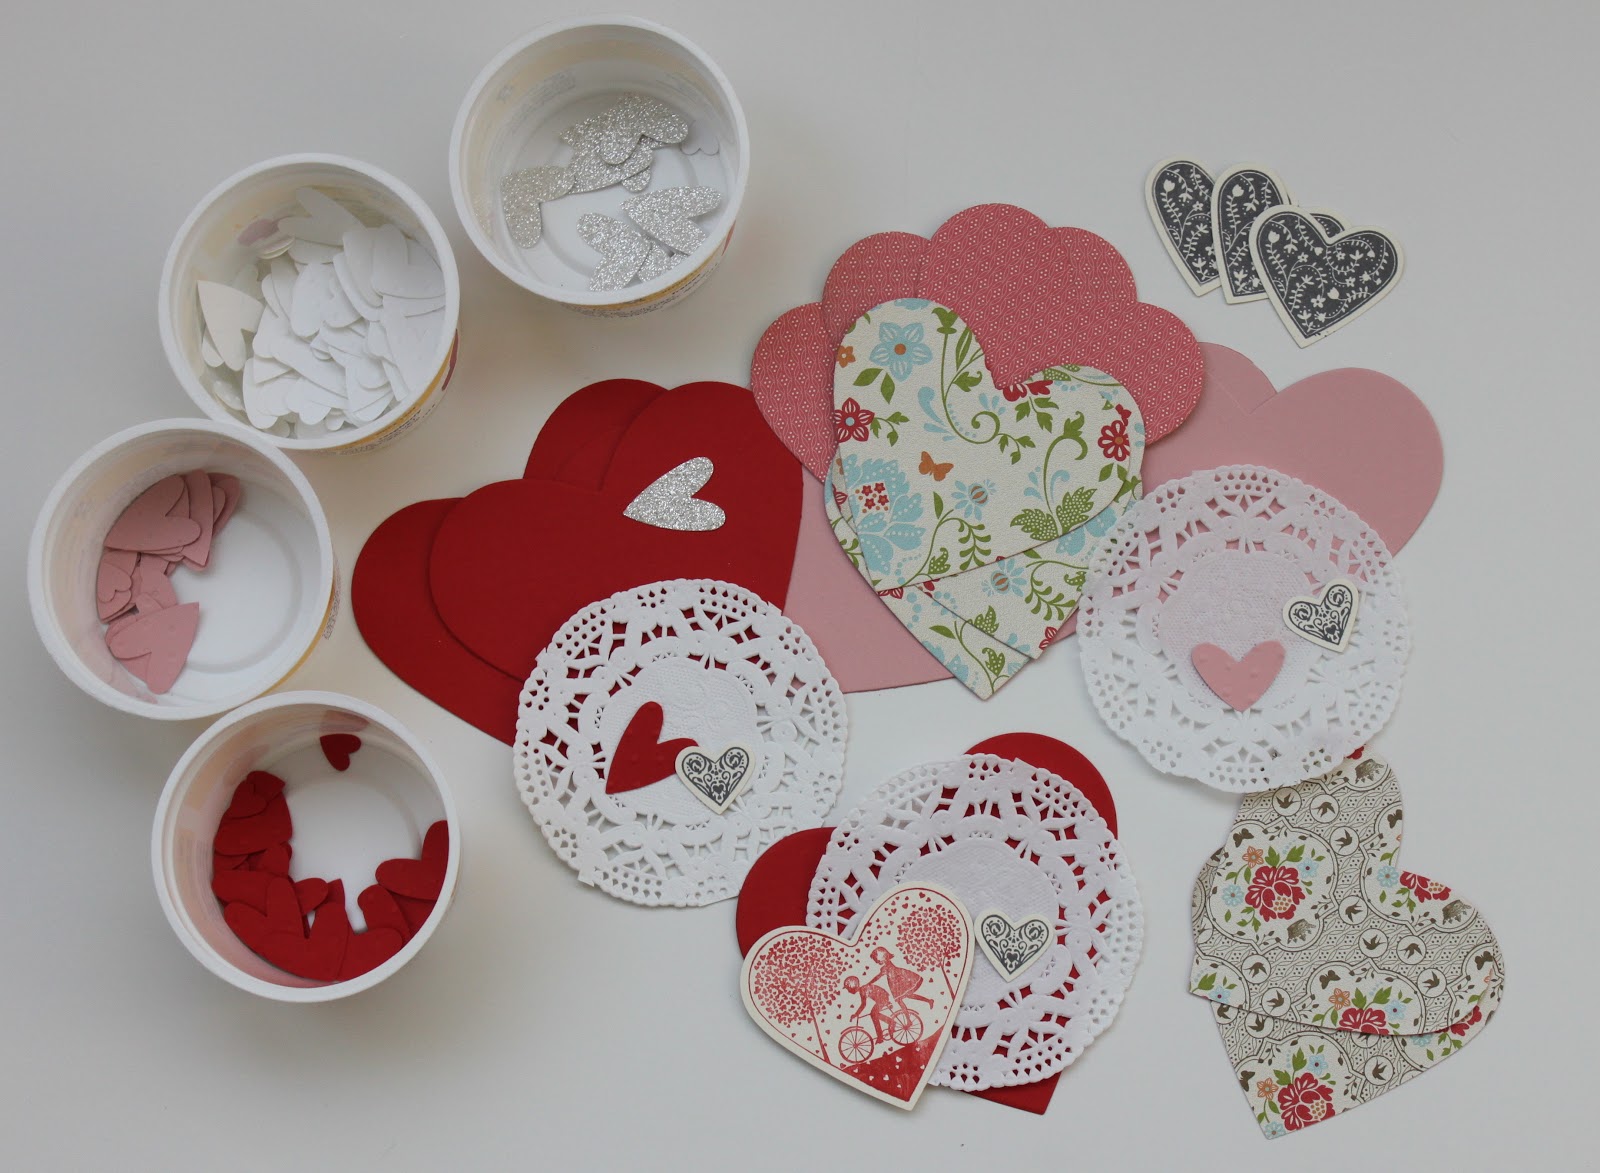
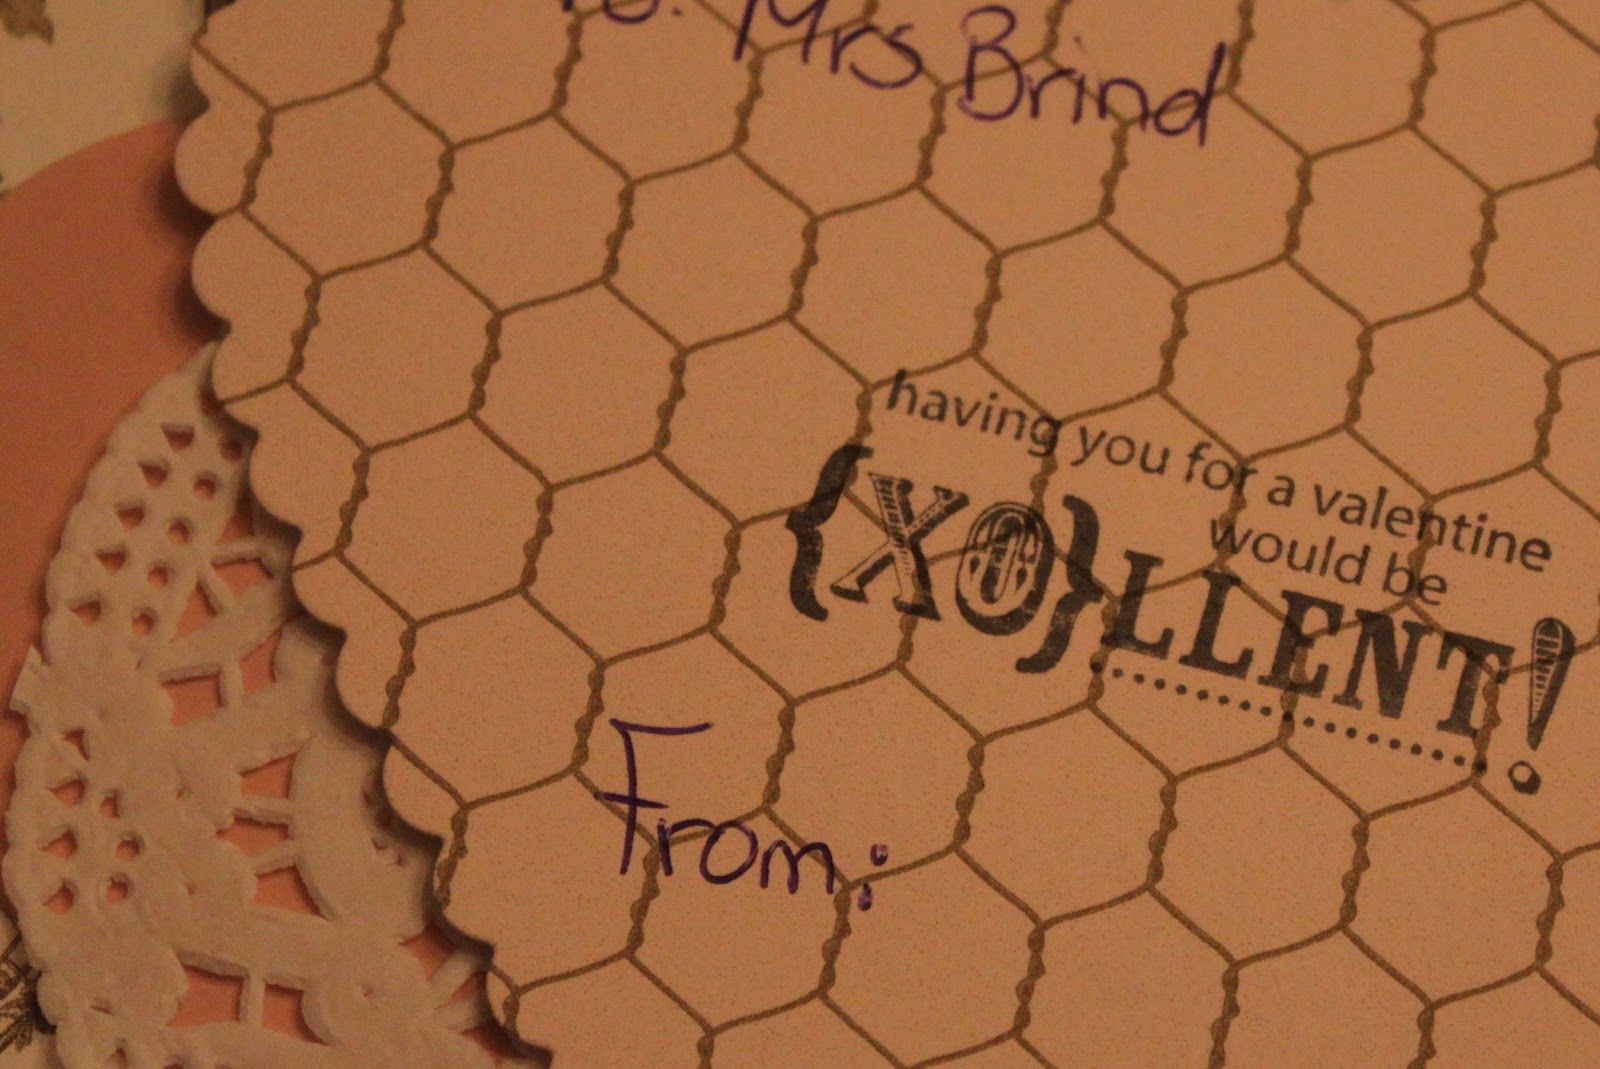
These are the ones I made for their teachers. The biggest heart is cut from a piece of Beau Chateau DSP.

Here are Christine’s finished ones. In all honesty, I think she had more fun handing them out to her little friends than she had making them!
Okay, that’s all I’ve got for you today. I hope your Valentine’s Day was a love filled as mine was!

Posted in Cards, Valentine's Day | 1 Comment

Happy Valentine’s Day

Today I have some fun pictures for you. First off, this is what I made for the girls this years.

I found these little tin buckets at Dollarama and couldn’t resist. I’m going to put more detailed descriptions about the heart cards on my Stampin’ Up BLOG so if you’re interested please follow this link.

I think the girls could care less about the cards or the buckets, they just wanted what was inside them!
And Greg got this card which I made at an Upline meeting a couple weeks ago.

And now for something a bit fun!
Today’s LOAD prompt was “Love Lasts” and I could have gone in so many directions but I took it in a totally fun one. Greg gave me a Toblerone rose this morning and while I was listening to Lain’s video message I was reminded that my love of Toblerone goes back to when I was a kid. We didn’t get a ton of candy so whenever we did it was a special event! Santa used to bring us a Toblerone in our stockings and if anyone came to visit us from overseas they’d inevitably bring one from the Duty Free. 
THEN I opened Stacey’s Twelve email which contained a picture of a heart made out of ribbons and stuff. She included a link and I’m going to encourage you to follow it too. Here it is. http://acreativemint.typepad.com/a_creative_mint/2011/02/happy-hearts.html
Instantly the words “Toblerone” and Love” came together in my head and led me to create the following layout.

I cut up the box to use as the title, created a heart out of buttons like in the blog post and used a sketch for Elle’s Studio Sketch Thursday. The picture is one of me in Switzerland on our Honeymoon pretending to take a bite out of a monster sized Toblerone bar. What the picture doesn’t show, is the fact that the Toblerone bar is actually the top part of a bike rack!! Ah, the Swiss!!

The red tag with the second part of my title on it is my Twelve Personalities embellishment. I figure this story paints a pretty good picture of my personality, don’t you?!

And a close up of my heart. I must say, I do love this!
Well, there you have it.
Happy Valentine’s Day everyone.
Hope you are all as high on sugar … er … love, as the girls’ and I are!! 🙂
Posted in Cards, challenges, LOAD, Twelve | 1 Comment

Project 12 My Way

Hello fellow crafters!
I’ve got another layout to share with you today as well as a card.

For the past 2 years I have played along with Davinie Fiero and Scrapbook and Cards Today in their Project 12 Challenge. The idea was that each month we were given a Becky Fleck Pagemaps sketch to play with and we created a month-in-review type page. I loved getting a new sketch each month and loved seeing how all the different participants interpreted them. This year they have changed the format. There are no new sketches (although we are welcome to mine their archives and re-use a sketch from the past 2 years) and instead of making it strictly about the entire month we can pick any topic, week, day, whatever to scrap. They have (and I think this will be a monthly thing) given us a colour scheme as an added challenge. I’m not thrilled about the changes but have decided that since my favourite part of the whole thing was documenting each month in one layout, that’s what I’m going to take from it and continue doing.

So … I decided to use a new sketch and used PageMaps’ January 2012’s double page layout sketch.

And this is what I came up with.

As you can see I used the sketch as a jumping off point but my pictures seemed to want to be arranged in a slightly different way. So I went with it!
Here are some close ups.

The left side – I used Crumb Cake smooth card stock as my base and layered two pieces from the Everyday Enchantment line in the background. 

The right side – I moved the title and journalling block to this side – again, it just seemed to want to be there!

I had a lot to say so I decided to type it up. I printed it onto Very Vanilla card stock and cut out the individual paragraphs for a more casual look.

My snowflakes (kind of fun that we actually had snow so I could use them!) were made with the Snowflake #2 die for the Big Shot (the large snowflake) and the snowflake punch. To attach them to the page and to add some sparkle I used the flower Brads. And speaking of sparkle, I also gave the snowflakes a liberal spraying of Vanilla Shimmer Smooch Spritz. The shine is subtle but it’s there!

Here is the smaller snowflake with the smaller size of flower brad.

For my title I used the Alphabet Soup On Board letters. They are raw chipboard so I coated them with two coats of Very Vanilla Craft Ink and a liberal coating of Vanilla Shimmer Smooch Spritz. 

Here is another of the snowflakes and you can also see that I popped up my title letters with Dimensionals for even more texture. I think the snowflake is curling up so much because it was slightly wet when I attached it to the page. I’m sure it will lay flat once it’s in a page protector!
Everything I’ve highlighted is available for order through me or through my on-line store (just follow the links). The Everyday Enchantment DSP is only available as a Sale-A-Bration purchase through me. The best way to get it is to host a workshop and for every purchase of $60 you get to choose one free item from the Sale-a-Bration list. 
Here is another project I did using this DSP.

I made these cards for an upline group meeting last week. We have card swaps so in return for making these, I got some really cute cards for my display board. 
To make this card I took a piece of the Everyday Enchantment DSP, cut it to size then ran it through my Big Shot using the Framelits Dies Hearts Collection. Behind the heart cut out I mounted both a smaller heart and a doily made using the Paper Doily Sizzlit Die which I had lightly sprayed with Log Cabin Smooch Spritz.
The bit along the bottom was created by rolling one of our Stampin’ Wheels along a piece of Very Vanilla card stock with the Decor standard wheel in Calypso Coral ink. I then tied a piece of Calypso Coral 1/8″ Organdy ribbon around it and through a Designer Series button from the Neutrals collection.
Hope you like these projects. If you are interested in making something similar please use the link at the side to email me. Space is still available in the Mommy and Me Valentines class so sign up now!
Thanks and Happy Crafting!

Posted in card swaps, layout, Project 12 | 2 Comments

Valentine’s for Mom and Me

Are you tired of sending out the same old store-bought cheesy Valentine’s to your kids’ classmates?
Would you like to send out homemade Valentine’s but don’t have the supplies or the ideas?
Do your kids hound you (speaking from personal experience here!) for paper, glue and scissors and then leave a mess expecting you to clean it up?

I have the solution!

Come to my house next Saturday and I’ll clean up after your kids!

Here’s a look at what I’ve got gathered – so far – for you and your child(ren) to work with.

If there aren’t enough hearts here to inspire some lovely Valentine’s for your child’s classmates then I’m not sure what else to do!!  

Choose your background heart colour, add a doily, stamp away and glue on some hearts. 

Easy peasy?

You will also have access to some Smooch Spritz in red (or clear) that would look really cute on those doilies!!
If you are interested, please leave a comment here (or on Facebook if that’s where you’re reading this) or email me using the link in the side bar. Cost is $25/child with each additional child being $15. Your child will be able to make a Valentine for each member of their class and one (larger one) for their teacher. 
Mom’s if your child is a bit older and doesn’t require your help, feel free to bring your own projects to work on. For a $5 drop-in fee you can have access to all my stamps, inks, punches and Big Shot dies. All I ask is that you bring your own project supplies, scissors and adhesive. I will also have some card kits for you to purchase and make here or at home.
When you ask? Saturday Feb 11th at either 2:00 – 4:00PM or 7:00 – 9:00PM. Just let me know which time slot you’d like. Ladies, if you’re coming to the later time slot feel free to BYOB!!
Thanks, hope to see you there.
Oh, and since it is Sale-a-Bration right now, any purchases over $60 qualify for a free item from the Sale-a-Bration list. I may even have a few extras on-hand for you to take home right away if you place a qualifying order!

Posted in Classes, Valentine's Day | 1 Comment

Been too busy to post!

Sorry everyone, I’ve been neglecting this blog and visiting other people’s blogs in favour of crafting my little butt off! What have I been crafting? Well, I’m still working on my Twelve layouts, as well, I had two Stampin’ Up! group meeting this week in which we swap cards so I had to come up with two different designs and then make a total of 25 cards over 2 days. (‘Cus you know I tend to do these things last minute!) What else … LOAD has started (see blinkie in my side bar to find out what that is) and I am actually caught up. In fact, I’m sort of ahead of the game … keep reading to have that one explained!

Here are quick pictures about my most recent layouts. For more detailed info please visit my Flickr Gallery. Thanks. Oh and to those of you who don’t give a you-know-what about my scrapping … I will endeavour to do better about taking regular life pictures and posting them too. I was looking through my January pictures and  was appalled at how few I had taken of life last month! Pathetic!!!

But I’m digressing … back to the layout pictures …

This was done using a sketch from Studio Calico (see below).
In my “to be sorted/scrapped” basket are a stack of team photos of both Marley and Paige (although, mostly Marley!) so this is me trying to get them scrapped!
This was also inspired by the Studio Calico sketch below but since this one actually used some Studio Calico products, this was the one I submitted to their Sunday Sketch challenge. (By the way, I just have to add that I actually WON a Studio Calico Sunday Sketch challenge for this layout. Yay me!) 
Aren’t the apples so cute?

Next we have this one.
This one was a bit of a slog for me. I spent about 3 days fiddling with it but now I am pretty happy with it. Please check out the details on my Flickr Gallery – there are some subtle ones that you can’t see from this picture. 
In Twelve Stacey encourages us to celebrate the every day things and I decided it was time for a layout about LC’s blanket – Dee-tee. It’s been such a part of her and we are slowly asking her to give it up. I wanted to have something for her to look back on when she’s older so she can remember the love she had for her blanket.
Journalling reads: 
Ah, Christine and her “Dee-tee” …
It’s a gorgeous cream coloured (when it’s clean!), satin backed, furry blanket. My dear friend Shalan gave it to her at birth and for the first few months it just sort of hung out in her crib. We started to encourage her to cuddle it at nap times and bed time – especially when we realized that she wasn’t going to take a soother. She’s the only one of our kids to suck her thumb! And oh, how she loves that thumb!!

When she started talking we realized she called her little blanket, her “dee-tee” and ever since, the name has stuck. She had to take Dee-tee everywhere! It’s been to Maui (and thrown up on – but that’s another story), to the PNE, to visit Santa, to the Fire Hall and to Granny Camp. Now she only gets Dee-tee at nap time and bed time. All other times of the day it lives above the fridge in the kitchen so there is no “sneaking a thumb suck” in the middle of the day.”

And now for my LOAD212 layouts.
Day One’s prompt was “You’ve got good taste” with the suggestion of scrapping a favourite restaurant, recipe or other food related memory. While going through my pictures I came across the Guinness is Good For You postcard (picked up in Ireland back in the late 90’s)  and remembered the St. Patrick’s Day feast I made last year. So, my totally simple, totally fast layout was done before I knew it. So fast in fact that I had time to scrap another very important food memory …

… my Mum’s shortbread recipe. This one took a bit longer but not much.
All in all, Day One was a huge success!
Onto Day Two and the prompt of “Favourite Photo”.
During my sort of the aforementioned basket, I’d come across this picture of me and Marley from 2004. It has always been one of my favourite pictures of myself so I knew it would be perfect for this prompt. The layout took awhile though and I’ve realized I’ve forgotten a title. But it’s done for now … a title can be added later, right?

Why do I love this picture? I’ll be honest, it’s because I love how young and thin and happy I look. 
Life with one kid was SO easy!!! (comparatively!)
 I was running, I had been playing Ultimate. I had a great haircut. 
Sigh.
Anyway, there you have it . I have to put the kids to bed and then I will try and get some pictures up on my other blog showing off my cards but no promises!
Talk to you later.

Posted in challenges, layout, LOAD212, Scrapbook, Twelve | Comments Off on Been too busy to post!

Layout for Get Picky

I’m determined to enter at least one (preferably more) scrapbook challenges each week. Today I have a layout to show you that I did using a sketch from Get Picky.
Here’s the sketch and my take on it.

I’m still working my way through my basket o’ memories (see this picture) and these pictures seemed perfect for this sketch. I replaced the 3rd photo in the sketch with a journaling block.

I don’t normally embellish my journaling blocks but this one was crying out for a couple touches so … voila! 

And finding a piece of ribbon with the words “ma ma” on it was serendipitous to say the  least!

Close up of the title. I added the subtitle because I really wanted to high light that milestone in Paige’s history.

This was a fun embellishment to make. I’d punched out 3 circles from a piece of transparent paper I found in my scrap drawer intending to use them as the sketch showed but felt this corner of the layout needed something … more … if you know what I mean. So I took a Jillibean Soup journaling spot and added the circles to it. Then it needed something in the centre so I started playing with another piece of the same ribbon from the journaling block and made this little rose bud type thing. Then I knew I needed to add one of my Twelve embellishments for Family Stories and found this orange flower in my tin. It all started coming together! Once the rose bud was glued on it looked a little lonely so I cut out some leaves and added them. 
There you have it. Thanks for stopping by!

Posted in challenges, Get Picky, Paige's Baby scrapbook, Scrapbook, Twelve | 6 Comments

Big Blue Eyes

I’ve got another layout of one of my beautiful daughters to share with you today. I’ve mixed several paper lines – just proves how versatile Stampin’ Up! products are!!

This is Paige and the final of the portrait shots that we had taken this past December that I plan to scrap. 
I’m planning to enter this layout into Elle’s Studio Thursday sketch challenge so here is the sketch we were given.
For my layout I started with a piece of 12×12 card stock in Bashful Blue. I inked the edges with Concord Crush and then layered  a piece of Sweet Shop DSP on top. The photo and journaling block (just a piece of Whisper White card stock) were mounted on Concord Crush card stock and then I added strips of papers from Cheerful Treat and Flirtatious DSP. 

One of the papers in the Flirtatious Specialty DSP is these awesome laser cut doilies so for the title I cut out three of them, layered them over some more Cheerful Treat paper and a piece of 1/2″ Stitched-Poly Ribbon in Concord Crush and adhered my letters on top. The word BIG is from the Word Play stamp set and originally said ‘Wish Big’ but I only needed the second word so just cut off the top of the stamped image.
I treated my letters in the same way as this layout. These are from the Alphabet Soup On Board set. First I inked them up with Bashful Blue, then I coated them in Crystal Effects and finally, to accent the word ‘blue’, I added a bit of Dazzling Details while the Crystal Effects was still wet. NOTE: I would do a second coat of ink before adding the other products next time. I’m not super happy that the letters look more grey than blue. But … it is what it is.

For this embellishment I cut out another of the laser cut doilies and added a plastic flower (from my Twelve embellishment tin so not Stampin’ Up!) and a Glimmer Brad. I also added a couple other brads from the Sweet Shop Jelly Bean and Everyday Enchantment collections. The Everyday Enchantment Ribbon and Brad pack is exclusive to the Sale-A-Bration catalogue so I can’t provide you a link but to view the catalogue please click here.
Here are more of the brads I used on this layout – more than I normally use, to be honest! The green one is another from the Sweet Shop Jelly Bean brad collection and the lighter purple one is from the IN COLOR Printed Designer brads.
Posted in Paige | 3 Comments